The Future of Regeneration: A 2024 Guide to 3D Printed Biopolymer Scaffolds for Tissue Engineering
This article provides a comprehensive overview of the latest advancements and methodologies in 3D printing for fabricating biopolymer scaffolds for tissue engineering.
The Future of Regeneration: A 2024 Guide to 3D Printed Biopolymer Scaffolds for Tissue Engineering
Abstract
This article provides a comprehensive overview of the latest advancements and methodologies in 3D printing for fabricating biopolymer scaffolds for tissue engineering. Targeted at researchers and biomedical professionals, it explores the foundational principles of scaffold design and biomaterial selection, details cutting-edge fabrication techniques like extrusion-based and light-based printing, and addresses critical challenges in resolution, mechanical properties, and biofunctionalization. It further examines rigorous validation protocols, including in vitro and in vivo assessments, and compares leading biopolymers like alginate, gelatin, PCL, and novel composites. The synthesis offers a roadmap for translating lab innovation into clinically viable tissue constructs.
Building the Blueprint: Core Principles and Material Selection for 3D Bioprinted Scaffolds
Application Notes
The convergence of 3D printing (additive manufacturing) and biopolymer science has created a paradigm shift in tissue engineering (TE). The central challenge is the rational design of scaffolds that precisely replicate the native tissue's extracellular matrix (ECM). This requires a holistic optimization of three interdependent pillars: Porosity, Mechanics, and Bioactivity. Failure to balance this triad leads to poor cell infiltration, mechanical failure, or insufficient biological integration. The following application notes contextualize this triad within a 3D bioprinting framework.
Porosity & Architecture
Porosity is not merely a percentage; it is a multi-faceted architectural feature defining a scaffold's capacity to support tissue ingrowth and vascularization.
- Total Porosity (70-90%): Essential for high cell loading and nutrient/waste diffusion. Below 60%, diffusion limitations become critical; above 95%, mechanical integrity is often compromised.
- Pore Size & Interconnectivity: Pore size dictates specific tissue responses. Bone regeneration typically requires >300 µm pores for vascularization, while neocartilage formation may utilize 150-250 µm pores. 100% interconnectivity is a non-negotiable target to prevent cell entrapment and necrotic cores.
- 3D Printing Control: Extrusion-based printing allows direct programming of strand distance (spacing) and layer height to dictate pore geometry. Melt Electrowriting (MEW) can produce ultrafine fibers to create microporosity within larger printed macro-pores.
Table 1: Target Porosity and Pore Size for Key Tissues
| Target Tissue | Optimal Total Porosity (%) | Optimal Pore Size Range (µm) | Critical Architectural Feature |
|---|---|---|---|
| Cancellous Bone | 70-90% | 300-600 µm | High interconnectivity, tortuous paths. |
| Articular Cartilage | 60-80% | 150-250 µm | Layered structure, graded porosity. |
| Skin (Dermal Layer) | 80-95% | 200-400 µm | Highly interconnected, thin fibrous walls. |
| Nerve Guidance | 70-85% | 50-150 µm (micro), >500 µm (macro) | Aligned, directional channels. |
| Vascular Networks | >90% | 500-1000 µm (channels) | Prefabricated, perfusable lumens. |
Mechanical Properties
Scaffold mechanics must match the native tissue's modulus and strength to provide structural support and transmit appropriate mechanobiological cues.
- Young's Modulus: The stiffness of the scaffold. Mismatch (e.g., a too-stiff scaffold in soft tissue) can cause stress shielding and hinder regeneration.
- Degradation Rate: Must be coupled with the rate of new tissue formation. Fast-degrading polymers (e.g., PLGA) may lose integrity before tissue matures, while slow-degrading ones (e.g., PCL) may cause chronic inflammation.
- Viscoelasticity: Native tissues (especially cartilage, skin) are viscoelastic. Advanced biopolymer blends and hydrogel designs are incorporating this property.
Table 2: Target Mechanical Properties for Key Tissues
| Target Tissue | Approximate Young's Modulus (MPa) | Desired Degradation Time | Key Mechanical Consideration |
|---|---|---|---|
| Cancellous Bone | 50-500 MPa | 6-18 months | High compressive strength (>2 MPa). |
| Articular Cartilage | 0.5-1.5 MPa | 3-12 months | High compressive & shear strength, lubricity. |
| Skin (Dermis) | 0.1-0.8 MPa | 2-8 weeks | Flexibility, tensile strength. |
| Cardiac Muscle | 0.01-0.5 MPa | 1-6 months | Elasticity, cyclic fatigue resistance. |
| Brain Tissue | 0.001-0.01 MPa | 2-12 weeks | Ultra-soft, viscoelastic. |
Bioactivity
Bioactivity bridges the synthetic scaffold and biological environment, guiding cell adhesion, proliferation, differentiation, and ECM production.
- Surface Chemistry: Intrinsic bioactivity of polymers (e.g., collagen, gelatin) vs. modified polymers (e.g., RGD-peptide grafted PCL).
- Controlled Release: Scaffolds as delivery vehicles for growth factors (e.g., BMP-2, VEGF) or drugs (antibiotics, anti-inflammatories) via encapsulation or surface tethering.
- Dynamic Signaling: Incorporation of enzyme-cleavable or stimuli-responsive peptides to mimic the dynamic nature of the ECM.
Experimental Protocols
Protocol 1: Design & 3D Printing of a Graded Porosity Scaffold
Objective: To fabricate a cylindrical PLA scaffold with radially graded porosity for bone-cartilage interface engineering. Materials: Medical-grade PLA filament, Fused Deposition Modeling (FDM) 3D printer, slicing software (e.g., Ultimaker Cura), isopropanol. Procedure:
- Design: Create a cylindrical model (Ø10mm x 5mm) in CAD software.
- Grading Strategy: In the slicing software, divide the model into three radial zones:
- Zone 1 (Center, Ø0-3mm): Set infill density to 80%, rectilinear pattern.
- Zone 2 (Middle, Ø3-7mm): Set infill density to 70%, gyroid pattern.
- Zone 3 (Outer, Ø7-10mm): Set infill density to 60%, gyroid pattern.
- Maintain a constant layer height (0.15mm) and nozzle temperature (210°C).
- Print: Execute the print on a clean build plate.
- Post-Processing: Carefully remove support structures (if any). Clean the scaffold via sonication in isopropanol for 5 minutes and air dry under a laminar flow hood.
- Sterilization: Sterilize via immersion in 70% ethanol for 30 minutes, followed by UV exposure on each side for 15 minutes.
Protocol 2: Mechanical Compression Testing of a Hydrated Scaffold
Objective: To determine the compressive modulus of a 3D-printed hydrogel scaffold under physiologically relevant (hydrated) conditions. Materials: Printed hydrogel scaffold (e.g., gelatin methacryloyl), universal mechanical tester equipped with a 50N load cell, phosphate-buffered saline (PBS), calipers. Procedure:
- Hydration: Soak the scaffold in PBS at 37°C for 24 hours to reach equilibrium swelling.
- Measurement: Gently blot the scaffold dry and measure its diameter and height using calipers.
- Setup: Place the scaffold centrally on the lower plate of the mechanical tester. Submerge the setup in a PBS bath at 37°C.
- Pre-load: Apply a small pre-load (0.01N) to ensure full contact.
- Test: Perform uniaxial compression at a constant strain rate of 1% per second until 60% strain is reached.
- Analysis: From the resulting stress-strain curve, calculate the compressive modulus as the slope of the initial linear elastic region (typically 5-15% strain). Report the average of n=5 samples.
Protocol 3: Assessment of Bioactivity via Cell Seeding and Differentiation
Objective: To evaluate the osteogenic bioactivity of a BMP-2 functionalized scaffold using human mesenchymal stem cells (hMSCs). Materials: PCL/BMP-2 scaffold, control PCL scaffold, hMSCs, osteogenic medium (OM: DMEM, 10% FBS, 10 mM β-glycerophosphate, 50 µg/mL ascorbic acid, 100 nM dexamethasone), basal growth medium (GM), Alizarin Red S stain, cell culture incubator (37°C, 5% CO2). Procedure:
- Seeding: Sterilize scaffolds (70% EtOH, UV). Pre-wet with medium. Seed hMSCs at a density of 50,000 cells/scaffold using the droplet method. Incubate for 2 hours, then add medium.
- Culture: Maintain half of the scaffolds from each group in OM and the other half in GM. Change medium every 3 days.
- Analysis (Day 21):
- Alizarin Red Staining: Fix scaffolds in 4% PFA, wash, incubate with 2% Alizarin Red S (pH 4.2) for 20 mins. Wash extensively. Image for mineralized nodule formation.
- Quantification: Elute stain with 10% cetylpyridinium chloride, measure absorbance at 562 nm.
- Expected Outcome: Significant increase in mineralization (absorbance) only in the BMP-2 functionalized scaffolds cultured in OM, confirming synergistic scaffold bioactivity and biochemical cues.
Visualizations
Triad of Scaffold Design for Tissue Regeneration
BMP-2 Induced Osteogenic Signaling Pathway
Scaffold Fabrication and Testing Workflow
The Scientist's Toolkit: Key Reagents & Materials
Table 3: Essential Research Reagents for 3D Biopolymer Scaffold R&D
| Item | Function in Research | Example / Note |
|---|---|---|
| Medical-Grade Biopolymers | Raw material for scaffold fabrication. Defines base degradability & mechanics. | PCL (Polycaprolactone): Slow-degrading, thermoplastic for FDM. GelMA (Gelatin Methacryloyl): Photocrosslinkable, bioactive hydrogel resin. PLGA (Poly(lactic-co-glycolic acid)): Tunable degradation rate. |
| Bioactive Peptides | Conjugated to polymers to impart specific cell-signaling functions. | RGD (Arg-Gly-Asp): Promotes integrin-mediated cell adhesion. IKVAV: Promotes neural cell adhesion and neurite outgrowth. |
| Growth Factors | Incorporated to guide stem cell differentiation and tissue formation. | rhBMP-2 (Recombinant Human): Potent osteoinductive factor. VEGF: Induces angiogenesis within scaffolds. Use carrier proteins (e.g., BSA) for stable encapsulation. |
| Photocrosslinkers | Initiate polymerization of light-sensitive bioinks (e.g., GelMA, PEGDA). | LAP (Lithium phenyl-2,4,6-trimethylbenzoylphosphinate): Biocompatible, visible-light (405 nm) photoinitiator. Irgacure 2959: UV (365 nm) photoinitiator. |
| Live/Dead Viability Assay | Standard kit for quantifying cell viability and distribution within 3D scaffolds. | Calcein AM (live/green) & Ethidium homodimer-1 (dead/red). Critical for assessing printing biocompatibility and seeding efficiency. |
| AlamarBlue / MTT Assay | Colorimetric or fluorescent assays to measure metabolic activity, indicating cell proliferation within scaffolds over time. | Requires establishing a standard curve. Data normalized to scaffold volume/mass. |
| PCR Primers & RNA Kits | To analyze cell differentiation by measuring tissue-specific gene expression (e.g., RUNX2, COL2A1, TNNT2). | RNA extraction from cells on 3D scaffolds is challenging; use kits optimized for fibrous/cartilaginous tissues. |
| Micro-CT Contrast Agent | Stains soft biopolymer scaffolds for high-resolution 3D architectural analysis. | Phosphotungstic acid (PTA) or Iodine. Allows quantification of porosity, pore size, and interconnectivity. |
| Enzymatic Degradation Buffer | Simulates hydrolytic or enzymatic degradation of scaffolds for in vitro degradation studies. | PBS (pH 7.4): For hydrolytic degradation. Collagenase or Lysozyme solutions: For enzyme-mediated degradation. |
This document, framed within a thesis on 3D printing for tissue engineering, provides application notes and detailed protocols for key biopolymers. The strategic selection of materials—natural, synthetic, or hybrid—dictates the scaffold's printability, mechanical integrity, bioactivity, and degradation profile, ultimately guiding cellular fate and tissue regeneration.
| Biopolymer Category | Material | Key Properties (2024 Perspective) | Prime Tissue Engineering Applications | Optimal 3D Printing Method (2024) | Typical Crosslinking Method |
|---|---|---|---|---|---|
| Natural | Alginate | Rapid ionic gelation; low cell adhesion; high biocompatibility. | Cartilage, wound dressings, drug delivery capsules. | Extrusion (ionic crosslinking bath). | Ionic (Ca²⁺, Ba²⁺). |
| Natural | Gelatin/GelMA | RGD sequences for cell adhesion; thermoresponsive. | Bone, vascular, skin regeneration. | Extrusion (cooled plate), DLP. | Photo (UV/LAP). |
| Natural | Hyaluronic Acid (HA) | CD44 receptor targeting; high hydration; regulates inflammation. | Neural, cartilage, dermal regeneration. | Extrusion, DLP. | Photo (e.g., methacrylation). |
| Synthetic | Poly(ε-caprolactone) (PCL) | High mechanical strength; slow degradation (>2 years); hydrophobic. | Load-bearing bone, cranial implants. | Fused Deposition Modeling (FDM), melt extrusion. | Thermal fusion. |
| Synthetic | Poly(lactic-co-glycolic acid) (PLGA) | Tunable degradation (weeks–months); FDA-approved. | Bone, controlled drug delivery scaffolds. | Extrusion (solvent-based). | Solvent evaporation. |
| Hybrid | Alginate-Gelatin | Combines alginate's structure with gelatin's bioactivity. | Modular tissue constructs, bioprinting. | Co-extrusion, composite bioink. | Dual: Ionic + Thermal/Photo. |
| Hybrid | PCL-GelMA | PCL provides mechanical framework; GelMA enables cell encapsulation. | Osteochondral, vascular grafts. | Sequential printing: FDM PCL + extrusion GelMA. | Thermal + Photo. |
Detailed Experimental Protocols
Protocol: 3D Bioprinting of a GelMA-HA Composite Hydrogel for Chondrogenesis
Objective: To fabricate a cell-laden, photocrosslinkable hydrogel scaffold supporting mesenchymal stem cell (MSC) chondrogenic differentiation.
The Scientist's Toolkit:
| Reagent/Material | Function |
|---|---|
| GelMA (Methacrylated Gelatin) | Provides photocrosslinkable, bioactive backbone with RGD sites. |
| HA-MA (Methacrylated Hyaluronic Acid) | Enhances water retention, provides CD44 binding sites for MSCs. |
| Lithium Phenyl-2,4,6-trimethylbenzoylphosphinate (LAP) | Cytocompatible photoinitiator for visible/UV light crosslinking. |
| Human Bone Marrow MSCs | Primary cells with chondrogenic potential. |
| Chondrogenic Medium | Contains TGF-β3, ascorbate, dexamethasone to drive differentiation. |
| Sterile PBS (pH 7.4) | For dilution and washing. |
| Bioprinter (Extrusion-based) | For precise deposition of bioink. |
| 405 nm LED Crosslinking System | For rapid, controlled photopolymerization post-printing. |
Procedure:
- Bioink Preparation:
- Dissolve LAP in PBS at 0.25% (w/v) to create stock solution. Sterile filter (0.22 µm).
- Prepare 7% (w/v) GelMA and 1% (w/v) HA-MA in the LAP/PBS solution. Gently mix at 37°C until fully dissolved. Avoid bubbles.
- Centrifuge the bioink at 300 x g for 5 minutes to remove bubbles.
- Keep bioink at 37°C until printing.
Cell Preparation and Encapsulation:
- Trypsinize, count, and pellet MSCs. Resuspend pellet in a small volume of bioink to achieve a final density of 5-10 x 10⁶ cells/mL.
- Gently mix the cell-bioink suspension. Keep on ice or at 15°C to prevent premature gelation.
3D Printing Process:
- Load bioink into a sterile, temperature-controlled (18-22°C) syringe fitted with a conical nozzle (22-27G).
- Set printing parameters: Pressure 15-25 kPa, speed 5-10 mm/s, layer height 80% of nozzle diameter.
- Print scaffold (e.g., 10x10x2 mm grid) onto a substrate.
- Immediately after each layer, expose to 405 nm light (5-10 mW/cm² for 15-30 seconds) for partial crosslinking.
Post-Printing and Culture:
- After final layer, perform a final crosslinking (60 seconds) for full structural integrity.
- Transfer scaffold to cell culture plate, wash with PBS, and immerse in chondrogenic medium.
- Culture for up to 28 days, changing medium every 2-3 days. Assess viability (Live/Dead), glycosaminoglycan content (DMMB assay), and collagen II expression (immunohistochemistry).
GelMA-HA Bioprinting Workflow
Protocol: Fabrication of a Dual-Scaffold PCL-PLGA Hybrid for Controlled Drug Release
Objective: To create a mechanically robust, drug-eluting scaffold via sequential 3D printing of PCL and PLGA layers.
Procedure:
- PCL Framework Printing (FDM):
- Load PCL filament into FDM printer. Set nozzle temperature to 85-95°C, bed to 45°C.
- Print a porous macro-scaffold (e.g., 0/90° laydown pattern, 300 µm strand, 500 µm pore) at 5-10 mm/s.
Drug-Loaded PLGA Solution Preparation:
- Dissolve PLGA (50:50 LA:GA) in DMSO or ethyl acetate at 20% (w/v).
- Add model drug (e.g., Dexamethasone or BMP-2) at 1-5% (w/w polymer). Sonicate to mix.
PLGA Coating/Drug Integration:
- Option A (Coating): Dip the printed PCL scaffold into the PLGA-drug solution. Withdraw slowly.
- Option B (Precision Deposition): Use a secondary extrusion system to print PLGA-drug solution directly into PCL pores.
- Dry scaffold in vacuum desiccator for 48 hours to remove all solvent.
Characterization & Release Study:
- Analyze morphology via SEM.
- Perform in vitro drug release in PBS (pH 7.4) at 37°C under gentle agitation. Sample supernatant at predetermined times and analyze via HPLC/UV-Vis. Replace with fresh PBS.
PCL-PLGA Hybrid Fabrication Process
Signaling Pathways in Scaffold-Mediated Tissue Regeneration
Scaffold-Cue Activated Signaling Pathways
Within the broader thesis on 3D printing of biopolymer scaffolds for tissue engineering, the precise formulation and characterization of bioinks is paramount. A bioink is not merely a cell-laden hydrogel; it is a sophisticated material system whose rheological behavior, crosslinking kinetics, and post-printing stability dictate the structural and biological fidelity of the final construct. This document provides application notes and detailed protocols for assessing these fundamental properties, enabling researchers to develop bioinks that meet the stringent criteria for printability and biological function.
Rheological Characterization of Bioinks
Rheology governs extrusion, shape fidelity, and cell viability during bioprinting. Key parameters include viscosity, shear-thinning behavior, yield stress, and viscoelastic moduli (G' and G'').
Table 1: Target Rheological Properties for Extrusion-Based Bioprinting
| Parameter | Ideal Range/Value | Rationale | Common Measurement Technique |
|---|---|---|---|
| Zero-shear viscosity | > 10 Pa·s | Prevents nozzle dripping and maintains pre-print structure. | Steady-shear flow ramp (0.01 - 1 s⁻¹). |
| Shear-thinning index (n) | n < 1 (Power-law model) | Viscosity decreases under shear for smooth extrusion, recovers after deposition. | Power-law fit to flow curve. |
| Apparent viscosity at printing shear rate | 10 - 100 Pa·s | Balances extrusion force and cell viability. | Measured at shear rate relevant to nozzle (e.g., 10 - 100 s⁻¹). |
| Yield stress (τ₀) | 50 - 500 Pa | Provides shape retention post-deposition. | Herschel-Bulkley model fit or amplitude sweep. |
| Storage Modulus (G') post-crosslinking | > 500 Pa | Ensures mechanical integrity of the final scaffold. | Oscillatory time sweep post-gelation. |
| Loss factor (tan δ = G''/G') | < 0.5 (post-gelation) | Indicates solid-like, elastic dominant behavior. | Oscillatory frequency sweep. |
Protocol 2.1: Comprehensive Rheological Assessment
Objective: To measure the flow behavior, viscoelasticity, and gelation kinetics of a candidate bioink.
Materials:
- Rheometer (cone-plate or parallel plate geometry, Peltier temperature control).
- Bioink sample (≥ 500 µL).
- Crosslinking agent (if applicable).
- Solvent trap or humid chamber to prevent drying.
Procedure:
- Loading: Pre-cool the plate to 4°C. Load the bioink onto the center of the lower plate. Bring the measuring geometry (e.g., 25 mm cone, 0.5° angle) to the prescribed gap (e.g., 0.1 mm). Trim excess material.
- Amplitude Sweep: At a constant frequency (1 Hz), perform an oscillatory strain sweep from 0.1% to 100% strain. Determine the linear viscoelastic region (LVR) where G' and G'' are strain-independent.
- Flow Curve: Perform a steady shear rate sweep from 0.01 s⁻¹ to 100 s⁻¹, then back down. Record viscosity. Fit data to Herschel-Bulkley model: τ = τ₀ + K * (γ̇)^n.
- Gelation Kinetics: Initiate a time sweep at 1 Hz and a strain within the LVR (e.g., 1%). Immediately after starting measurement, introduce the crosslinking trigger (e.g., mix in UV initiator, change temperature to 37°C, add ionic crosslinker via pipette at edge of geometry). Monitor G' and G'' until plateau.
- Frequency Sweep: After gelation, perform a frequency sweep from 0.1 to 100 Hz at constant LVR strain.
Crosslinking Mechanisms
Crosslinking transforms a viscous bioink into a stable hydrogel. Mechanisms can be physical (reversible) or chemical (permanent).
Table 2: Common Bioink Crosslinking Mechanisms
| Mechanism | Trigger | Example Polymers | Key Advantages | Key Considerations |
|---|---|---|---|---|
| Ionic | Divalent cations (Ca²⁺, Mg²⁺) | Alginate, Gellan Gum | Fast, mild, cytocompatible. | Can be slow to diffuse; chelation can cause instability. |
| Thermal | Temperature shift (↑ or ↓) | Gelatin, Matrigel, Pluronic F127, Agarose | Physiologic for some (collagen). | Low mechanical strength; potential cell settling during gelation. |
| Photo- chemical | UV/Visible Light (λ = 365-405 nm) | GelMA, PEGDA, Hyaluronic Acid Methacrylate | Spatiotemporal control, good mechanics. | Photoinitiator cytotoxicity; UV damage to cells. |
| Enzymatic | Enzyme + Co-factor | Fibrin (Thrombin+Fibrinogen), Tyramine-substituted polymers (HRP+H₂O₂) | High specificity, physiologic mimicry. | Reaction kinetics can be complex; enzyme cost. |
| pH / Supramolecular | pH change or self-assembly | Chitosan (pH), Peptide amphiphiles | Reversible, can mimic ECM dynamics. | Sensitive to environmental conditions. |
Protocol 3.1: In-situ Rheological Monitoring of UV Crosslinking
Objective: To quantify the gelation kinetics and final modulus of a photo-crosslinkable bioink (e.g., 5% w/v GelMA).
Materials:
- Rheometer with UV-curing accessory (light guide, 365 nm LED/lamp).
- GelMA bioink with 0.5% w/v Lithium phenyl-2,4,6-trimethylbenzoylphosphinate (LAP) photoinitiator.
- Quartz or disposable transparent bottom plate.
Procedure:
- Setup: Install the UV-transparent bottom plate and light guide. Set rheometer temperature to 25°C.
- Loading: Load the GelMA-LAP bioink onto the plate. Use a 20 mm parallel plate geometry with a 0.5 mm gap.
- Pre-Cure Measurement: Perform an amplitude sweep to determine the LVR. Set a time-sweep measurement at 1 Hz, 2% strain (within LVR).
- Curing: Start the time sweep. After 30 seconds of baseline measurement, initiate UV exposure at a defined intensity (e.g., 5 mW/cm²) for 60 seconds via the rheometer software trigger.
- Post-Cure: Continue the time sweep for 10 minutes after UV turns off to monitor modulus plateau. Record the gelation time (crossover of G' and G'') and final plateau storage modulus (G').
Printability Assessment Criteria
Printability is a multi-faceted metric encompassing fidelity, resolution, and cell viability.
Protocol 4.1: Quantitative Printability Assessment via Grid Structure
Objective: To evaluate shape fidelity, filament uniformity, and pore uniformity of a printed bioink.
Materials:
- Extrusion bioprinter.
- Bioink in sterile cartridge.
- Printing substrate (e.g., Petri dish, glass slide).
- Calipers or microscope with image analysis software (e.g., ImageJ).
Procedure:
- Design: Design a 10 mm x 10 mm single-layer grid with a 2 mm center-to-center filament spacing.
- Printing: Print the grid under standardized conditions (pressure, speed, nozzle gauge—e.g., 22G, 410 µm).
- Imaging: Allow initial gelation (if needed), then acquire a top-down image under a microscope or scanner.
- Analysis:
- Filament Diameter: Measure diameter at 10 points per filament. Calculate average and coefficient of variation (CV).
- Pore Area: Measure the area of 5 central pores. Calculate average and CV.
- Shape Fidelity: Compare printed pore area (Aprinted) to designed pore area (Adesign = 4 mm²). Fidelity = (Aprinted / Adesign) * 100%.
- Scoring: A printable ink typically exhibits filament diameter CV < 15%, pore area CV < 20%, and shape fidelity > 85%.
Protocol 4.2: Post-Printing Cell Viability Assessment (Live/Dead Assay)
Objective: To determine the immediate and 24-hour post-printing viability of encapsulated cells.
Materials:
- Bioink with encapsulated cells (e.g., 1x10⁶ cells/mL NIH/3T3 fibroblasts).
- Sterile culture medium.
- Live/Dead Viability/Cytotoxicity Kit (e.g., Calcein AM / Ethidium homodimer-1).
- Confocal microscope or fluorescence plate reader.
Procedure:
- Printing: Print a simple structure (e.g., a 3-layer lattice) into a sterile well plate.
- Crosslink: Apply the appropriate crosslinking method (e.g., UV, CaCl₂ spray) per the bioink's requirements.
- Culture: Add pre-warmed culture medium and incubate at 37°C, 5% CO₂.
- Staining: At timepoints T=1h and T=24h post-print: a. Aspirate medium. b. Incubate with Live/Dead stain (e.g., 2 µM Calcein AM, 4 µM EthD-1 in PBS) for 30-45 minutes at 37°C. c. Gently rinse with PBS.
- Imaging & Quantification: Acquure z-stack images via confocal microscopy. Use image analysis software to count live (green) and dead (red) cells in multiple fields of view. Calculate viability: % Viability = (Live cells / Total cells) * 100.
Visualization
Bioink Development & Assessment Workflow
Photo-Crosslinking Mechanism Pathway
The Scientist's Toolkit: Essential Research Reagent Solutions
Table 3: Key Reagents for Bioink Development & Analysis
| Item | Function & Rationale | Example Product/Catalog |
|---|---|---|
| High-Purity Alginate | Provides ionic crosslinking backbone; low endotoxin critical for cell culture. | Pronova UP MVG (Novamatrix). |
| Gelatin Methacryloyl (GelMA) | Combines RGD motifs of gelatin with controllable photo-crosslinking. | GelMA Kit (Advanced BioMatrix). |
| Lithium Phenyl-2,4,6-Trimethylbenzoylphosphinate (LAP) | Cytocompatible, water-soluble photoinitiator for UV/blue light crosslinking. | LAP (Sigma-Aldrich, 900889). |
| Recombinant Human Thrombin | Enzyme for enzymatic crosslinking of fibrin-based bioinks; high purity. | Factor IIa (Enzyme Research Labs). |
| Calcium Chloride (CaCl₂) Solution | Ionic crosslinker for alginate; sterile, tunable concentration (e.g., 100-500 mM). | Prepared in-house, 0.22 µm filtered. |
| Live/Dead Viability/Cytotoxicity Kit | Dual-fluorescence stain for immediate quantification of cell viability post-print. | Thermo Fisher Scientific, L3224. |
| Rheometer with UV & Temp Control | For comprehensive rheological characterization and in-situ gelation studies. | Discovery Hybrid Rheometer (TA Instruments). |
| Sterile Bioprinting Nozzles | Disposable, cell-friendly nozzles to maintain sterility and reduce shear stress. | 22G-30G conical nozzles (CELLINK). |
| Basement Membrane Matrix (e.g., Matrigel) | Thermo-reversible, ECM-rich hydrogel for co-printing or support baths. | Corning Matrigel, 356231. |
Application Notes
Biomimetic scaffold design leverages nature's evolutionary solutions to create synthetic extracellular matrices (ECMs) that guide tissue regeneration. The integration of computational modeling allows for the prediction of scaffold behavior in silico before physical fabrication, optimizing design parameters for specific tissue engineering applications. This approach is critical for advancing the 3D printing of biopolymers like alginate, chitosan, gelatin-methacryloyl (GelMA), and polycaprolactone (PCL), where mechanical properties, pore architecture, and bioactivity must be precisely controlled.
Core Application Principles:
- Hierarchical Structure Imitation: Computational tools (e.g., finite element analysis, FEA) are used to model and replicate the multi-scale porosity found in natural bone, cartilage, or vasculature.
- Dynamic Mechanical Cues: Models simulate mechanical stimuli (e.g., fluid shear stress in perfusion bioreactors) to design scaffolds that promote mechanotransduction pathways in seeded cells.
- Predictive Degradation & Nutrient Diffusion: Computational models forecast scaffold degradation kinetics and nutrient/waste diffusion profiles to match tissue ingrowth rates.
Key Quantitative Benchmarks: Table 1: Target Scaffold Properties for Specific Tissues Based on Biomimetic Design
| Tissue Target | Ideal Porosity (%) | Average Pore Size (µm) | Compressive Modulus (kPa or MPa) | Primary Biomimetic Feature | Modeling Tool Commonly Used |
|---|---|---|---|---|---|
| Cancellous Bone | 70-90 | 300-600 | 0.1-2 MPa | Trabecular lattice structure | Topology optimization, FEA |
| Articular Cartilage | 60-80 | 100-300 | 100-1000 kPa | Zonal composition & stratification | Multiphysics simulation |
| Skin | 80-95 | 50-250 | 2-50 kPa | Random fibrous mesh (collagen mimic) | Agent-based modeling |
| Liver | 85-95 | 200-400 | 1-10 kPa | Lobule-like hexagonal unit cells | CFD for perfusion analysis |
| Nerve Guide | 70-85 | 50-150 (axial channels) | 0.5-5 kPa | Aligned topographical guidance | Diffusion-reaction modeling |
Experimental Protocols
Protocol 1: Computational Design & FEA of a Biomimetic Trabecular Bone Scaffold
Objective: To design and mechanically simulate a 3D-printable scaffold mimicking human trabecular bone architecture.
Materials & Software:
- Micro-CT scan data of human cancellous bone (public repository, e.g., NIH NLM).
- Image processing software (ImageJ, 3D Slicer).
- CAD/Mesh generation software (Autodesk Fusion 360, Blender, nTopology).
- FEA software (ANSYS, COMSOL, or open-source FEBio).
- Stereolithography (SLA) or Fused Deposition Modeling (FDM) 3D printer.
- Biopolymer resin or filament (e.g., PCL or PLA for proof-of-concept).
Procedure:
- Data Acquisition & Segmentation:
- Import micro-CT DICOM files into 3D Slicer.
- Apply a threshold filter to segment bone tissue from void space.
- Generate a 3D surface mesh (STL file) of the bone microstructure.
Design Translation & Optimization:
- Import the STL into CAD software. Scale the model to desired dimensions (e.g., 10x10x10 mm).
- Apply a periodic tessellation or unit cell replication to create a scaffold from the bone microstructure pattern.
- Use topology optimization module (if available) to minimize material while maintaining a stiffness target (e.g., 1 MPa).
- Export the final scaffold design as an STL for printing and a finer mesh (e.g., INP, XML) for FEA.
Finite Element Analysis (FEA):
- Import the scaffold mesh into FEA software. Assign material properties (e.g., PCL: E ≈ 350 MPa, ν ≈ 0.3).
- Apply a fixed constraint to the bottom surface and a distributed compressive load (e.g., 10 N) to the top surface.
- Mesh the model with tetrahedral elements and run a static structural analysis.
- Analyze results: von Mises stress distribution, displacement, and effective compressive modulus.
- Iterate the CAD design if stress concentrations exceed material yield strength or if modulus deviates >15% from target.
3D Printing & Validation (Proof-of-Concept):
- Slice the optimized STL using printer-specific software (e.g., Chitubox for SLA, Cura for FDM).
- Print the scaffold using PCL (FDM, nozzle: 110°C, bed: 60°C) or a biocompatible resin (SLA).
- Perform micro-CT on the printed scaffold to compare pore size/porosity to the digital model.
- Conduct mechanical compression testing (ASTM D695) to validate FEA-predicted modulus.
Protocol 2: Modeling & 3D Printing of a Graded Zonal Cartilage Scaffold
Objective: To fabricate a GelMA-based scaffold with zonal variations in density and stiffness mimicking articular cartilage.
Materials & Software:
- Gelatin-methacryloyl (GelMA, 5-20% w/v).
- Photoinitiator (Lithium phenyl-2,4,6-trimethylbenzoylphosphinate, LAP).
- Digital Light Processing (DLP) 3D bioprinter.
- Computational fluid dynamics (CFD) software (e.g., ANSYS Fluent, SIMPLE algorithm in OpenFOAM).
- Rheometer.
Procedure:
- Computational Zonal Design:
- Design a rectangular scaffold (e.g., 5x5x3 mm) in CAD. Partition it into three horizontal zones (superficial, middle, deep).
- Assign progressively lower porosity (higher density) from the superficial (90%) to deep zone (70%).
- Generate three corresponding STL files with differing internal lattice densities (e.g., gyroid lattice with varying unit cell sizes).
CFD for Perfusion Prediction:
- Import each zonal scaffold STL into CFD software as a fluid domain (porous media).
- Apply a steady-state fluid flow (culture media, μ=0.89 cP) across the scaffold with an inlet velocity of 100 µm/s.
- Simulate and record the wall shear stress (WSS) distribution within each zone. Optimize lattice densities to achieve a WSS gradient (e.g., 1-5 mPa) suitable for chondrocyte culture.
Bioink Preparation & Printing:
- Prepare three separate GelMA bioinks: 5% w/v (superficial zone), 10% w/v (middle zone), 15% w/v (deep zone). Dissolve in PBS with 0.25% w/v LAP.
- Load bioinks into separate syringes. Using a multi-material DLP or extrusion printer, print the scaffold layer-by-layer, changing bioinks at predetermined z-heights according to the CAD model.
- Crosslink each layer with 405 nm blue light (10-20 mW/cm² for 30-60 seconds).
Validation:
- Use confocal microscopy (after staining) to confirm zonal structure.
- Perform oscillatory rheometry on cylindrical samples of each pure bioink to confirm a gradient in storage modulus (G').
- Seed with human mesenchymal stem cells (hMSCs) and culture in chondrogenic medium. Analyze zone-specific gene expression (COL2A1, ACAN, PRG4) via qPCR after 21 days.
Signaling Pathways in Biomimetic Scaffold-Cell Interaction
Diagram 1: Key mechano-chemical signaling pathways activated by biomimetic scaffolds.
Experimental Workflow for Integrated Design
Diagram 2: Biomimetic design and modeling workflow for scaffold fabrication.
The Scientist's Toolkit: Research Reagent Solutions
Table 2: Essential Materials for Biomimetic Scaffold Research
| Item | Function/Application | Example Product/Specification |
|---|---|---|
| GelMA (Gelatin Methacryloyl) | Photo-crosslinkable hydrogel mimicking natural ECM; allows cell encapsulation and DLP printing. | Advanced BioMatrix GelMA Kit (Degree of substitution: ~70%). |
| LAP Photoinitiator | Biocompatible initiator for rapid UV/blue light crosslinking of hydrogels (e.g., GelMA, PEGDA). | Sigma-Aldrich, Lithium phenyl-2,4,6-trimethylbenzoylphosphinate. |
| PCL (Polycaprolactone) | Biodegradable, thermoplastic polyester for FDM printing; provides mechanical strength for bone scaffolds. | Polysciences, Medical Grade, Mn 45,000-60,000. |
| RGD Peptide | Cell-adhesive motif (Arg-Gly-Asp) conjugated to scaffolds to enhance integrin-mediated cell attachment. | Peptides International, Cyclo(RGDfK). |
| Recombinant Human TGF-β3 | Growth factor for chondrogenic differentiation; can be physically absorbed or covalently bound to scaffold. | PeproTech, Carrier-Free, >97% purity. |
| Alginate (High G-content) | Ionic-crosslinkable biopolymer for extrusion bioprinting; forms gentle gels for cell delivery. | NovaMatrix Pronova SLG100 (G-content >60%). |
| FEBio Studio | Open-source FEA software specifically for biomechanics and biomaterials. | febio.org. |
| Human MSCs | Primary cells for evaluating osteogenic and chondrogenic potential of scaffolds in vitro. | Lonza, Poietics Human Mesenchymal Stem Cells. |
| Micro-CT System | Non-destructive 3D imaging for analyzing scaffold porosity, pore size, and mineralized tissue formation. | Bruker SkyScan 1272 (resolution < 5µm). |
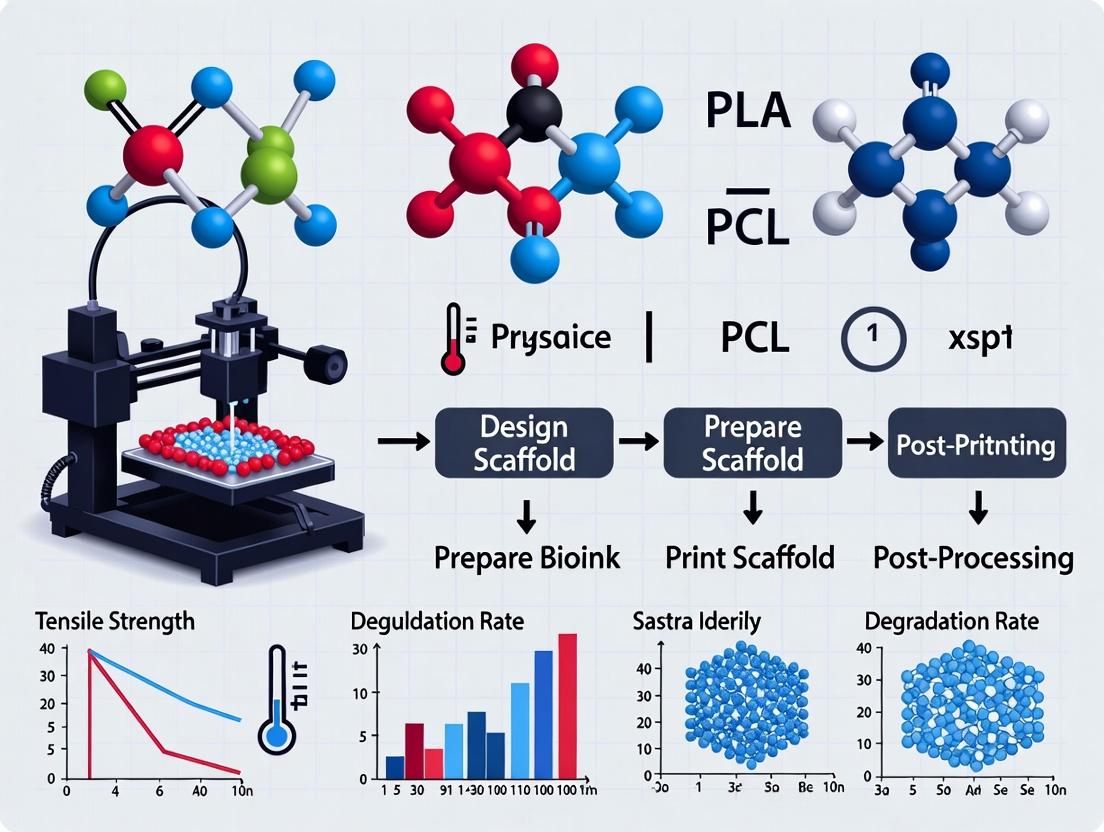
From Digital Model to Biological Construct: Cutting-Edge 3D Printing Techniques and Tissue-Specific Applications
Application Notes
Within the thesis on 3D printing of biopolymer scaffolds for tissue engineering, Fused Deposition Modeling (FDM) and Direct Ink Writing (DIW) emerge as fundamental, accessible, and versatile extrusion techniques. FDM, utilizing thermoplastic biopolymers, is prized for its mechanical robustness and geometric fidelity, making it suitable for hard tissue models and sacrificial molds. DIW, printing with shear-thinning bioinks, is the cornerstone for cell-laden constructs and soft hydrogel matrices, enabling high cell viability and biological functionality. The choice between methodologies hinges on the target tissue's mechanical requirements, biological objectives, and material constraints.
Table 1: Comparative Performance of FDM and DIW Bioprinting
| Parameter | FDM (Thermoplastic) | DIW (Hydrogel Bioink) |
|---|---|---|
| Typical Resolution | 50 - 400 µm | 100 - 500 µm |
| Print Temperature | 70 - 250 °C (nozzle) | 4 - 37 °C (stage/nozzle) |
| Cell Incorporation | Post-printing seeding only | Direct encapsulation possible |
| Typical Viability | N/A (acellular printing) | 70% - 95% (cell-laden) |
| Key Mechanical Property | High stiffness (MPa to GPa range) | Low stiffness (Pa to kPa range) |
| Common Biomaterials | PCL, PLA, PLGA | Alginate, GelMA, Collagen, Fibrin |
| Critical Printing Parameter | Nozzle temperature, layer height | Pressure, speed, rheology (viscosity, yield stress) |
Table 2: Quantitative Outcomes for Representative Scaffolds (Recent Studies)
| Biopolymer | Method | Key Outcome Metric | Value | Application Context |
|---|---|---|---|---|
| PCL | FDM | Compressive Modulus | 15 - 85 MPa | Bone tissue engineering |
| PLA/PEG Blend | FDM | Porosity | 60 - 75% | Osteochondral scaffolds |
| Alginate/GelMA | DIW | Cell Viability (Day 1) | 92 ± 3% | Cartilage bioprinting |
| Silk Fibroin | DIW | Shear Storage Modulus (G') | 12.5 kPa | Soft tissue constructs |
| Collagen I | DIW | Gelation Time (37°C) | 5 - 15 min | Dermal models |
Detailed Experimental Protocols
Protocol 1: FDM Printing of PCL Lattice Scaffolds for Bone Tissue Engineering
Objective: To fabricate a porous, mechanically stable PCL scaffold for subsequent cell seeding and osteogenic studies.
Materials:
- PCL filament (3 mm diameter, Mw ~50,000)
- Commercial or custom FDM bioprinter
- Heated build plate
- Sterile 70% ethanol
- Phosphate-Buffered Saline (PBS)
Procedure:
- Design & Slicing: Design a 10x10x3 mm 3D lattice (e.g., 0/90° lay-down pattern, pore size 500 µm) using CAD software. Export as STL. Import into slicing software (e.g., Ultimaker Cura). Set layer height to 200 µm, nozzle diameter to 400 µm, nozzle temperature to 85°C, and build plate temperature to 45°C. Generate G-code.
- Printer Setup: Load PCL filament. Allow nozzle and bed to reach set temperatures. Perform standard purging and priming.
- Sterilization: Wipe the build plate with 70% ethanol and allow to dry.
- Printing: Initiate print. Monitor first layer adhesion.
- Post-processing: After completion, carefully remove the scaffold. For cell culture, sterilize by immersion in 70% ethanol for 30 minutes, followed by three 15-minute washes in sterile PBS under UV light. Place in culture medium for preconditioning before cell seeding.
Protocol 2: DIW of Cell-Laden Alginate/GelMA Bioink for Soft Tissue Constructs
Objective: To bioprint a living construct with high post-print viability for soft tissue modeling.
Materials:
- Bioink: 3% (w/v) Alginate, 5% (w/v) GelMA, 0.5% LAP photoinitiator.
- Cell type (e.g., NIH/3T3 fibroblasts) at 80% confluency.
- DIW bioprinter (pneumatic or mechanical extrusion).
- Crosslinking solution: 100 mM CaCl₂ in PBS.
- UV light source (365 nm, 5-10 mW/cm²).
- Sterile printing cartridges and nozzles (22G-27G).
Procedure:
- Bioink Preparation: Sterilize alginate and GelMA solutions by filtration (0.22 µm). Mix to final concentrations. Add LAP and mix thoroughly. Keep at 37°C until use.
- Cell Harvest & Encapsulation: Trypsinize cells, centrifuge, and resuspend in a small volume of bioink to achieve a final density of 5-10 x 10⁶ cells/mL. Gently mix without introducing bubbles. Keep on ice or at room temperature to prevent premature gelation.
- Printer Setup: Load cell-laden bioink into a sterile cartridge. Attach a conical nozzle (e.g., 25G, ~250 µm inner diameter). Mount onto the printer. Set stage temperature to 15-20°C.
- Printing Parameters: Optimize pressure (typically 15-30 kPa) and speed (5-15 mm/s) for continuous filament formation. Print a 15x15 mm grid structure (2-5 layers).
- Dual Crosslinking: Immediately after deposition, spray or mist with CaCl₂ solution for ionic crosslinking of alginate (30-60 s). Subsequently, expose the entire construct to UV light (365 nm, 30-60 seconds) for covalent crosslinking of GelMA.
- Post-print Culture: Gently transfer constructs to a 6-well plate, wash with warm PBS, and add complete culture medium. Assess viability via Live/Dead assay at 24 hours.
Visualizations
The Scientist's Toolkit: Key Research Reagent Solutions
Table 3: Essential Materials for Extrusion Bioprinting Research
| Item | Function | Key Considerations |
|---|---|---|
| PCL (Polycaprolactone) Filament | FDM thermoplastic for hard, biodegradable scaffolds. | Molecular weight affects viscosity & degradation rate. |
| GelMA (Gelatin Methacryloyl) | Photo-crosslinkable DIW bioink backbone. | Degree of functionalization controls mechanics & cell adhesion. |
| Alginate, High G-Content | DIW bioink for ionic gelation; provides shape fidelity. | Purification level impacts cytocompatibility. |
| LAP Photoinitiator | Initiates GelMA crosslinking under UV (365-405 nm). | Low cytotoxicity and efficient at low concentrations (~0.25%). |
| Sterile CaCl₂ Solution (100mM) | Ionic crosslinker for alginate; induces rapid gelation. | Concentration affects gelation speed and final stiffness. |
| Rheology Modifiers (e.g., nanoclay, methylcellulose) | Modifies bioink viscoelasticity for printability. | Must be cytocompatible and not interfere with crosslinking. |
| Cell-Ready PBS | For bioink dilution, washing, and reagent preparation. | Must be calcium/magnesium-free if used with alginate before crosslinking. |
| Dynamic Mechanical Tester | Quantifies storage/loss moduli (G', G'') of bioinks. | Critical for determining shear-thinning and recovery behavior. |
Within the broader thesis on 3D printing of biopolymer scaffolds for tissue engineering, this document details the application of vat photopolymerization techniques—specifically Stereolithography (SLA) and Digital Light Processing (DLP). These light-based methods offer superior resolution and surface finish, enabling the fabrication of scaffolds with precise architectural features that mimic the native extracellular matrix (ECM). This precision is critical for controlling cell-material interactions, guiding tissue regeneration, and advancing drug screening platforms.
Comparative Analysis: SLA vs. DLP for Biopolymer Scaffolds
The fundamental difference lies in the light source and patterning mechanism. SLA uses a single UV laser point to scan and cure each layer, while DLP projects a single UV image of an entire layer at once via a digital micromirror device (DMD). The table below summarizes key quantitative parameters.
Table 1: Comparative Technical Specifications of SLA and DLP for Biopolymer Fabrication
| Parameter | Stereolithography (SLA) | Digital Light Processing (DLP) | Significance for Tissue Engineering |
|---|---|---|---|
| Light Source | UV Laser (e.g., 355 nm, 405 nm) | UV LED Projector (e.g., 385 nm, 405 nm) | Wavelength dictates photoinitiator selection & cytocompatibility. |
| Typical XY Resolution | 25 - 150 µm | 10 - 50 µm | DLP offers finer features, beneficial for small-diameter vascular channels. |
| Layer Thickness (Z) | 10 - 100 µm | 10 - 50 µm | Thinner layers improve vertical feature resolution & surface finish. |
| Print Speed | Slower (point-by-point scanning) | Faster (full-layer projection) | DLP throughput is higher, advantageous for high-throughput scaffold production. |
| Common Biopolymers | Methacrylated gelatin (GelMA), Hyaluronic acid (HAMA), PEGDA | Methacrylated gelatin (GelMA), Poly(ethylene glycol) diacrylate (PEGDA), Methacrylated silk fibroin | Materials require functionalization with photoreactive groups (e.g., acrylates, methacrylates). |
| Critical Energy (Ec) | 25 - 150 mJ/cm² (material dependent) | 25 - 150 mJ/cm² (material dependent) | Minimum energy required for gelation; key for protocol optimization. |
Application Notes
Material Selection & Bioink Formulation
The core requirement is a photocrosslinkable biopolymer "resin." GelMA is predominant due to its inherent bioactivity and tunable mechanical properties. A typical formulation includes:
- Photopolymer: GelMA (5-15% w/v).
- Photoinitiator: Lithium phenyl-2,4,6-trimethylbenzoylphosphinate (LAP) (0.1-0.5% w/v) is preferred over Irgacure 2959 due to better water solubility and curing efficiency at 405 nm.
- Light Absorber: Optional addition of tartrazine (e.g., 0.05% w/v) to control penetration depth and improve XY resolution.
Design for Light-Based Printing
- Support Structures: Necessary for overhangs >45° in SLA; often less critical in DLP with a bottom-up orientation.
- Pixel Calibration (DLP): Essential to account for optical distortion and ensure dimensional accuracy. A calibration grid print is recommended.
- Exposure Optimization: A critical print parameter determined by the "working curve" (penetration depth, Dp, vs. exposure energy).
Experimental Protocols
Protocol: Determination of Curing Parameters via Working Curve
Objective: To establish the relationship between UV exposure energy and cured layer thickness for a new bioink formulation.
Materials:
- Photocurable bioink (e.g., 10% GelMA, 0.25% LAP).
- SLA or DLP printer with calibrated light source.
- Glass slides or printing substrate.
- Micrometer or profilometer.
Method:
- Sample Exposure: Dispense a small pool of bioink onto a substrate. Expose to a single UV light pattern (e.g., a rectangle) with varying exposure times (e.g., 1, 2, 5, 10, 15 s). Keep light intensity constant.
- Washing: Gently rinse uncured material with warm PBS.
- Measurement: Measure the thickness of each cured rectangle using a micrometer.
- Calculation: Calculate exposure energy (E) for each time (t): E = I * t, where I is irradiance (mW/cm²). Measure irradiance with a radiometer.
- Model Fitting: Plot cured depth (Cd) vs. ln(Exposure Energy, E). Fit data to the Jacobs Working Curve equation: Cd = Dp * ln(E / Ec).
- Dp (Penetration Depth): Slope, indicates depth at which irradiance drops to 1/e. Higher Dp means deeper curing.
- Ec (Critical Energy): X-intercept, minimum energy for gelation.
Table 2: Example Working Curve Data for 10% GelMA / 0.25% LAP at 405 nm
| Exposure Time (s) | Exposure Energy, E (mJ/cm²) | Cured Depth, Cd (µm) | ln(E) |
|---|---|---|---|
| 2 | 40 | 85 | 3.69 |
| 5 | 100 | 175 | 4.61 |
| 10 | 200 | 285 | 5.30 |
| 15 | 300 | 360 | 5.70 |
| Calculated Dp | ~200 µm | ||
| Calculated Ec | ~25 mJ/cm² |
Protocol: SLA/DLP Printing of a Lattice Scaffold for Cell Seeding
Objective: To fabricate a high-resolution 3D porous scaffold for subsequent in vitro cell culture studies.
Pre-Print:
- Design: Create a 3D model (e.g., .STL) of a gyroid or rectangular lattice with pore size 300-500 µm and strut diameter of 150-200 µm.
- Bioink Preparation: Synthesize and functionalize polymer (e.g., GelMA). Dissolve in PBS with LAP at 37°C. Sterile filter (0.22 µm).
- Printer Setup: Sterilize resin vat and build platform with 70% ethanol and UV light. Calibrate build platform.
Printing (DLP Bottom-Up Example):
- Parameters: Set layer thickness (e.g., 50 µm). Calculate layer exposure time (t): t = (Ec + (layer thickness / Dp)) / I. Using Table 2 data and I=20 mW/cm²: t = (25 + (50/200)) / 20 = ~1.4 seconds per layer.
- Print: Initiate print. The build platform lowers into the bioink, the DMD projects the first layer image for the calculated t, the platform lifts to allow resin recoat, and the cycle repeats.
Post-Print:
- Retrieval: Carefully remove scaffold from the build plate.
- Washing: Rinse in sterile PBS to remove uncured precursor.
- Post-Curing: Optional exposure to a broad-spectrum UV light to ensure complete crosslinking.
- Characterization: Image via SEM/micro-CT. Perform mechanical testing (compressive modulus).
- Cell Seeding: Sterilize scaffolds in antibiotic solution. Seed with cells (e.g., mesenchymal stem cells) at a density of 1-5 million cells/mL scaffold volume via pipette or vacuum seeding.
The Scientist's Toolkit: Key Research Reagent Solutions
Table 3: Essential Materials for SLA/DLP Bioprinting
| Item | Function & Relevance |
|---|---|
| Methacrylated Gelatin (GelMA) | Gold-standard photocurable bioink; provides RGD motifs for cell adhesion and tunable degradability. |
| Lithium Phenyl-2,4,6-trimethylbenzoylphosphinate (LAP) | Highly efficient, water-soluble photoinitiator activated by 405 nm light; enables rapid gelation at low concentrations. |
| Poly(ethylene glycol) diacrylate (PEGDA) | Bio-inert, synthetic polymer used to create precise hydrogels; modulus easily tuned by weight % or molecular weight. |
| Digital Micromirror Device (DLP) Evaluation Kit | Allows researchers to modify and calibrate DLP projection parameters for custom printer builds. |
| UV Radiometer | Critical for measuring irradiance (mW/cm²) at the build plane to accurately calculate exposure energy. |
| Silicone-coated Release Liner (for bottom-up DLP) | Creates a non-stick, oxygen-permeable inhibition layer at the vat bottom, preventing adhesion and facilitating resin recoating. |
Visualized Workflows & Pathways
SLA and DLP Bioprinting Workflow
Exposure Energy Effects on Scaffold Properties
This application note, framed within a thesis on 3D biopolymer printing, details protocols for fabricating and characterizing scaffolds for three distinct regenerative targets. The convergence of biomaterial science and additive manufacturing enables the creation of spatially defined, bioactive constructs that mimic native tissue microenvironments.
Table 1: Key Biomaterial Properties for Target Tissues
| Tissue Type | Ideal Scaffold Modulus (MPa) | Target Porosity (%) | Degradation Time (Weeks) | Key Bioactive Cues |
|---|---|---|---|---|
| Bone | 50 - 2000 | 70 - 90 | 8 - 52 | Ca²⁺/PO₄³⁻, BMP-2, RGD peptide |
| Cartilage | 0.1 - 1 | 60 - 80 | 12 - 104 | TGF-β3, HA, Chondroitin Sulfate |
| Vascular | 0.5 - 5 (compliant) | 75 - 85 | 8 - 16 (temporary) | VEGF, PDGF, SDF-1α |
Table 2: Common Biopolymers & Composite Formulations
| Biopolymer Base | Crosslinking Method | Bioink Concentration (w/v%) | Key Additive (for Composite) | Print Fidelity Score* (1-5) |
|---|---|---|---|---|
| Alginate | Ionic (CaCl₂) | 3 - 5% | Nanohydroxyapatite (nHA) | 3 |
| Gelatin Methacryloyl (GelMA) | Photo (UV, LAP) | 5 - 15% | Hyaluronic Acid Methacrylate | 4 |
| Polycaprolactone (PCL) | Thermal | N/A (melt) | Tricalcium Phosphate (TCP) | 5 |
| Fibrin | Enzymatic (Thrombin) | 10 - 20 mg/mL | Heparin (for GF binding) | 2 |
*Score: 1=Poor, 5=Excellent shape fidelity & resolution.
Detailed Experimental Protocols
Protocol 3.1: Extrusion 3D Printing of GelMA-nHA Composite for Bone
Objective: Fabricate an osteogenic, mechanically robust scaffold. Materials:
- GelMA (Degree of substitution >70%)
- Photoinitiator LAP (Lithium phenyl-2,4,6-trimethylbenzoylphosphinate)
- Nanohydroxyapatite (nHA) powder (<200 nm)
- Sterile PBS, Bioprinter (extrusion-based), 405 nm UV light source.
Method:
- Bioink Preparation: Dissolve GelMA at 10% w/v in PBS at 37°C. Add LAP to 0.25% w/v. Gradually incorporate nHA at 5% w/v of total polymer weight under vigorous stirring. Centrifuge (2000 x g, 5 min) to degas.
- Printing: Load ink into a sterile cartridge. Use a 22G nozzle (410 μm). Set printing parameters: Pressure = 25-30 kPa, Speed = 8 mm/s, Bed Temp = 15°C. Print a 0/90° lattice (10x10x2 mm).
- Crosslinking: Immediately post-print, irradiate with 405 nm UV light (5 mW/cm²) for 60 seconds per layer.
- Post-Processing: Wash scaffolds 3x in PBS. Store in cell culture medium at 37°C for 24 hrs before mechanical testing or seeding.
Protocol 3.2: Digital Light Processing (DLP) of Alginate-Diacrylate for Cartilage
Objective: Create high-resolution, chondro-permissive scaffolds with encapsulated cells. Materials:
- Sodium Alginate, Methacrylic anhydride
- Photoinitiator (VA-086), Chondroitin sulfate
- Primary chondrocytes, DLP Bioprinter, Digital micromirror device (DMD) projector.
Method:
- Synthesis of Alginate-Diacrylate (AlgDA): React 2% w/v alginate with 0.5 mL methacrylic anhydride per gram of alginate in deionized water, pH 8-9, 4°C for 24h. Purify via dialysis and lyophilize.
- Cell-laden Bioink: Dissolve AlgDA at 3% w/v and chondroitin sulfate at 1% w/v in DMEM. Add VA-086 (0.1% w/v). Gently mix with chondrocytes (20x10⁶ cells/mL).
- DLP Printing: Load resin into vat. Project a series of 2D slice images (50 μm layer thickness, 10s exposure per layer at 405 nm, 15 mW/cm²) to cure the full 3D construct.
- Ionic Reinforcement: Post-print, submerge scaffolds in 100 mM CaCl₂ solution for 5 min to provide secondary ionic crosslinking. Rinse and culture in chondrogenic medium.
Protocol 3.3: Coaxial Printing of PCL-GelMA Core-Sheath for Vasculature
Objective: Fabricate a perfusable, endothelialized tubular construct. Materials:
- PCL pellets (Mn 45,000), GelMA (as in 3.1)
- Coaxial printhead (inner: 25G, outer: 21G), Heated extrusion system.
- HUVECs (Human Umbilical Vein Endothelial Cells).
Method:
- Material Prep: Melt PCL at 90°C in a separate printer cartridge. Prepare cell-laden GelMA (7.5% w/v with 0.15% LAP and 5x10⁶ HUVECs/mL) as in 3.1.
- Coaxial Printing: Mount coaxial nozzle. Set PCL (core) to 95°C, pressure 80 kPa, speed 5 mm/s. Set GelMA (sheath) to 25°C, pressure 40 kPa. Print a tubular spiral (ID=2 mm, height=10 mm).
- Simultaneous Crosslinking: Use a focused UV spot (365 nm, 10 mW/cm²) directed at the point of deposition to instantly photopolymerize the GelMA sheath.
- Maturation: Transfer construct to bioreactor, perfuse with EGM-2 medium at 5 mL/min, 1 Hz pulsatile flow for 7 days to promote endothelial monolayer formation.
Signaling Pathways & Workflow Visualizations
Diagram Title: BMP & Integrin Signaling in Bone Regeneration
Diagram Title: Workflow for 3D Bioprinted Cartilage Scaffolds
Diagram Title: Perfusion & VEGF Drive Vascular Maturation
The Scientist's Toolkit: Research Reagent Solutions
Table 3: Essential Materials for Biopolymer Scaffold Fabrication
| Item | Function & Rationale | Example Supplier/Cat. #* |
|---|---|---|
| GelMA (High DoS) | Gold-standard photocrosslinkable hydrogel; provides cell-adhesive motifs and tunable mechanics. | Advanced BioMatrix, 5010-DS-050 |
| LAP Photoinitiator | Biocompatible, water-soluble photoinitiator for visible light crosslinking (405 nm). | Sigma-Aldrich, 900889 |
| Nanohydroxyapatite (nHA) | Mineral component of bone; enhances osteoconductivity and compressive modulus of composites. | Berkeley Advanced Biomaterials, 1006 |
| Alginate Diacrylate (AlgDA) | Combines alginate's gentle ionic gelation with controllable covalent photocrosslinking for high-resolution prints. | Prepared in-lab per Protocol 3.2 |
| Polycaprolactone (PCL) | Biodegradable, thermoplastic polyester for melt extrusion; provides long-term structural support. | Sigma-Aldrich, 440744 |
| Recombinant Human TGF-β3 | Key inductive growth factor for chondrogenesis in cartilage scaffolds. | PeproTech, 100-36E |
| Recombinant Human VEGF₁₆₅ | Critical factor for endothelial cell proliferation, migration, and vascular tube formation. | R&D Systems, 293-VE-050 |
| Dynamic Perfusion Bioreactor | Provides physiological shear stress to vascular constructs, enhancing endothelial cell maturation. | Instron (Bose) ElectroForce, or custom systems. |
*Supplier examples are for reference; equivalents are available.
Application Notes
Multi-Material Printing for Biomimetic Scaffolds
Application: Fabrication of osteochondral tissue scaffolds. Multi-material extrusion printing allows for the deposition of distinct bioinks, each tailored to the chondral (cartilage) and subchondral (bone) regions, mimicking the native zonal composition and graded mechanical properties. Key Data: The table below summarizes print parameters and outcomes for a representative osteochondral construct.
Table 1: Print Parameters & Outcomes for a Dual-Material Osteochondral Scaffold
| Region | Biopolymer Composite | Nozzle Temp (°C) | Print Pressure (kPa) | Layer Height (µm) | Post-Print Modulus (kPa) |
|---|---|---|---|---|---|
| Chondral | 4% Alginate / 3% Hyaluronic Acid / Chondrocytes | 22 (cold) | 25 | 150 | 12 ± 3 |
| Osseous | 5% GelMA / 10% β-TCP / MSCs | 28 | 35 | 200 | 850 ± 120 |
Protocol: Multi-Material Printing of Graded Osteochondral Scaffold
- Bioink Preparation: Prepare chondral and osseous bioinks as per Table 1. Sterilize materials via 0.22 µm filtration (polymers) or UV irradiation (ceramics). Mix cells at a density of 10x10^6 cells/mL into the respective pre-gel solutions just before printing.
- Printer Setup: Configure a dual-extrusion bioprinter with temperature-controlled printheads. Load bioinks into separate sterile syringes fitted with conical nozzles (25G for chondral, 22G for osseous).
- Print Path Programming: Design a cylindrical scaffold (Ø10mm x 4mm) with a defined interface. Program a 0/90° laydown pattern. For the lower 2mm, assign the osseous bioink; for the upper 2mm, assign the chondral bioink.
- Print Execution: Maintain stage at 15°C. Print the osseous layers first. Pause at the interface, purge nozzles with sterile PBS if needed, and switch to the chondral bioink to complete the construct.
- Crosslinking: Post-print, immerse scaffold in 2% CaCl₂ solution (for alginate) for 5 min, then expose to 405 nm light (5 mW/cm², 60 sec) for GelMA crosslinking.
- Culture: Transfer to chondrogenic medium for the upper half and osteogenic medium for the lower half in a biphasic culture system.
Embedded Printing for Complex Vasculature
Application: Creation of free-form, perfusable vascular networks within a bulk soft matrix. Embedded 3D printing (FRESH, SWIFT, or suspension printing) enables the deposition of fugitive or crosslinkable inks within a supportive yield-stress hydrogel bath, preventing collapse during printing. Key Data: Parameters for printing a perfusable endothelialized network.
Table 2: Parameters for Embedded Printing of a Perfusable Network
| Component | Material | Print Speed (mm/s) | Pressure (kPa) | Fiber Diameter (µm) | Post-Processing |
|---|---|---|---|---|---|
| Fugitive Ink | 4% Carbowax (PEG) + 0.5% Laponite | 8 | 45 | 250 | 4°C chilling to solidify |
| Support Bath | 1.5% Microgelated Alginate / 2% Gelatin | N/A | N/A | N/A | 37°C liquefaction for removal |
| Matrix Ink | 5% Fibrinogen / Collagen I | 6 | 30 | N/A | Thrombin crosslink |
Protocol: Embedded Printing of a Perfusable Vascular Channel
- Support Bath Synthesis: Prepare a yield-stress bath by mixing microgelated alginate particles with gelatin. Pour into a printing chamber and equilibrate to 15°C.
- Fugitive Ink Deposition: Load fugitive ink into a cooled syringe (4°C). Print a branching network design within the support bath. The bath's shear-thinning property allows nozzle movement and immediate self-healing to support the printed structure.
- Matrix Casting: Gently infiltrate the pre-cooled matrix ink (fibrinogen/collagen) around the printed fugitive network using a pipette, avoiding direct disruption.
- Crosslinking & Removal: Raise temperature to 37°C to melt the gelatin in the bath and liquefy the periphery. Gently wash away the support bath with warm PBS. Add thrombin solution (2 U/mL) to crosslink the fibrin matrix. Lower temperature to 4°C to solidify the fugitive ink.
- Channel Evacuation: Apply gentle vacuum or pressure-driven flow of cold PBS to evacuate the liquefied fugitive ink, leaving behind patent, interconnected channels.
- Endothelialization: Inject a suspension of Human Umbilical Vein Endothelial Cells (HUVECs, 5x10^6 cells/mL) into the channels and allow for adhesion under rotational culture (2 rpm, 30 min).
4D Shape-Morphing Scaffolds for Dynamic Structures
Application: Self-rolling tubular constructs for neural guide conduits. 4D printing involves designing 2D or 3D constructs with anisotropic, stimuli-responsive materials that evolve into a pre-programmed 4D shape (space + time) under a specific trigger (e.g., hydration, temperature). Key Data: Design and actuation parameters for a self-rolling bilayer tube.
Table 3: Design & Actuation of a 4D Bilayer Neural Conduit
| Layer | Biopolymer | Crosslink Density | Print Speed (mm/s) | Swelling Ratio (Hydration) | Trigger | Actuation Time (min) | Final Curvature (mm⁻¹) |
|---|---|---|---|---|---|---|---|
| Active | 8% GelMA | Low (0.1% Photoinitiator) | 10 | 3.2 ± 0.3 | 37°C PBS | 15 ± 2 | 0.25 ± 0.03 |
| Passive | 8% GelMA | High (0.3% Photoinitiator) | 8 | 1.5 ± 0.2 | N/A | N/A | N/A |
Protocol: 4D Printing of a Self-Rolling Tubular Conduit
- Anisotropic Bioink Design: Prepare two batches of GelMA bioink. For the active, high-swelling layer, use a low concentration of photoinitiator (LAP, 0.1% w/v). For the passive, restrictive layer, use a high concentration (0.3% w/v).
- 2D Pattern Printing: Print a flat, rectangular bilayer construct (20mm x 5mm) onto a hydrophobic substrate. First, print the passive layer. Immediately print the active layer directly on top. Use 405 nm light (15 mW/cm², 30 sec per layer) for crosslinking.
- 4D Activation Mechanism: Upon immersion in 37°C PBS, the active layer hydrates and swells significantly more than the passive layer. This differential swelling strain generates a bending moment.
- Shape Morphing: The imposed strain causes the flat bilayer sheet to progressively bend, rolling around the long axis to form a tubular conduit. The final diameter is dictated by the width of the sheet and the differential swelling ratio.
- Validation & Cell Seeding: Measure the kinetics of rolling and final tube diameter. Seed Schwann cells or neural progenitors into the lumen after morphing is complete.
Visualization
Diagram 1: Workflow for Multi-Material Osteochondral Scaffold
Diagram 2: Embedded Printing of Vascular Network
Diagram 3: 4D Shape-Morphing Mechanism
The Scientist's Toolkit
Table 4: Essential Research Reagent Solutions for Advanced Bioprinting
| Item | Function & Application |
|---|---|
| Methacrylated Gelatin (GelMA) | A photo-crosslinkable, cell-adhesive hydrogel workhorse. Used for multi-material and 4D printing due to tunable mechanical properties. |
| Alginate (High G-Content) | Rapid ionic crosslinking (with Ca²⁺) allows for structural fidelity in multi-material prints and is used in support bath formulations. |
| Hyaluronic Acid (Methacrylated) | Provides bioactive cues for chondrogenesis; used in chondral bioinks. Modifiable for crosslinking. |
| β-Tricalcium Phosphate (β-TCP) Microparticles | Osteoconductive filler for osseous bioinks, enhancing mechanical stiffness and bioactivity. |
| Laponite RD Nanoclay | Rheological modifier to impart shear-thinning and yield-stress properties for embedded printing support baths and bioink reinforcement. |
| Polyethylene Glycol (PEG) with Pluronic F127 | A fugitive (sacrificial) ink for embedded printing of channels; liquefies upon cooling for easy removal. |
| Lithium Phenyl-2,4,6-Trimethylbenzoylphosphinate (LAP) | A biocompatible photoinitiator for visible light (405 nm) crosslinking of methacrylated polymers (GelMA, Hyaluronic Acid). |
| Microgelated Alginate Particles | Key component of granular support baths for embedded printing, providing a yield-stress, self-healing environment. |
Overcoming Fabrication Hurdles: Strategies for Optimizing Print Fidelity, Mechanics, and Cellular Response
Nozzle Clogging in Biopolymer Extrusion
Application Notes: Nozzle clogging is a predominant failure mode when printing viscous, particle-filled, or thermosensitive biopolymer inks (e.g., alginate, chitosan, collagen, PLGA). Clogging results from premature crosslinking, thermal degradation, particle aggregation, or improper rheological management.
Quantitative Data Summary: Table 1: Common Biopolymers, Their Clogging Risks, and Mitigation Parameters
| Biopolymer | Typical Concentration | Key Clogging Risk Factor | Recommended Nozzle Diameter (µm) | Critical Printing Temperature | Viscosity Range (Pa·s) |
|---|---|---|---|---|---|
| Alginate | 2-4% (w/v) | Ionic crosslinking at tip | 200-600 | 20-25°C (Ambient) | 10-200 |
| Chitosan | 2-3% (w/v) in weak acid | High viscosity, shear-thinning | 400-800 | 20-37°C | 50-500 |
| PLGA | 10-30% (w/v) in solvent | Solvent evaporation at tip | 150-400 | 20-25°C (Ambient) | 200-2000 |
| Collagen Type I | 5-10 mg/mL | Thermal gelation (> 20°C) | 250-500 | 4-10°C (Cold plate) | 1-50 |
| Silk Fibroin | 15-30% (w/v) | β-sheet crystallization | 100-300 | 20-25°C | 100-1000 |
Experimental Protocol: Protocol for Assessing and Preventing Nozzle Clogging
- Ink Rheological Characterization:
- Using a cone-and-plate rheometer, perform a shear rate sweep (0.1 to 100 s⁻¹) at the printing temperature to confirm shear-thinning behavior.
- Conduct a time sweep at constant shear rate (10 s⁻¹) for 30 minutes to monitor viscosity stability.
- Nozzle Health Assessment:
- Before printing, extrude ink into a weigh boat for 60 seconds at the target pressure/flow rate. Weigh the extrudate. Repeat thrice. A >15% decrease in mass indicates incipient clogging.
- Inspect the extruded filament under a stereomicroscope for consistent diameter and surface smoothness.
- Preventive Nozzle Priming and Cleaning:
- For aqueous biopolymers: Prime the nozzle/system with a 0.1% (v/v) Tween-20 solution, followed by a rinse with sterile PBS or deionized water.
- For solvent-based biopolymers (PLGA): Prime with the matching pure solvent (e.g., DMSO, Hexafluoroisopropanol).
- Between prints, implement a stringent cleaning protocol: physical clearing with a precision wire (e.g., 70µm diameter for a 200µm nozzle), followed by sonic bath in appropriate solvent/cleaner for 5 minutes.
The Scientist's Toolkit: Research Reagent Solutions for Clogging Mitigation
| Item | Function |
|---|---|
| Sterile, Low-Protein-Binding Filters (e.g., 5-40 µm) | Pre-filtration of ink to remove aggregates before loading into the print cartridge. |
| Rheology Modifiers (e.g., Glycerol, Laponite RD) | Adjust ink viscoelastic properties to enhance shear-thinning and reduce post-extrusion swelling. |
| Crosslinking Modulators (e.g., Ca-EDTA for alginate) | For ionic crosslinkers, use chelators to delay gelation until after extrusion. |
| Temperature-Controlled Print Bed/Nozzle Sleeve | Maintains ink below its gelation or degradation temperature throughout the fluid path. |
| Precision Nozzle Cleaning Kit (Wires, Brushes) | For physical removal of cured material from the nozzle lumen. |
Title: Workflow for Biopolymer Nozzle Clogging Prevention
Layer Delamination in Scaffold Fabrication
Application Notes: Layer delamination (poor interlayer adhesion) compromises scaffold structural integrity and pore interconnectivity. For biopolymers, causes include insufficient binding chemistry, rapid drying/solidification, and inadequate surface energy between layers.
Quantitative Data Summary: Table 2: Strategies to Enhance Interlayer Adhesion for Common Biopolymers
| Biopolymer | Primary Solidification Mechanism | Adhesion-Promoting Strategy | Quantitative Improvement in Bond Strength | Key Parameter for Optimization |
|---|---|---|---|---|
| Alginate | Ionic (Ca²⁺) Crosslinking | Partial-Dry Layer Printing | Bond strength increase up to 300% | Layer Drying Time (5-15 sec) |
| Chitosan | Solvent Evaporation / pH Shift | Solvent Vapor Exposure | Interlayer diffusion depth increased by 50µm | NH₄OH Vapor Exposure Time |
| PLGA | Solvent Evaporation / Sintering | Chloroform Vapor Smoothing | Tensile strength increase of 200% | Vapor Exposure Duration (10-30s) |
| Collagen | Thermal Gelation / pH Neutralization | Controlled Humidity (>95% RH) | Prevents premature drying, improves fusion | Chamber Humidity & Temperature |
| Silk Fibroin | Alcohol-Induced Crystallization | Methanol Vapor Post-Processing | Creates unified β-sheet network across layers | Methanol Exposure (10-60 min) |
Experimental Protocol: Protocol for Quantifying and Preventing Layer Delamination
- Scaffold Printing for Tensile Test:
- Print a standardized rectangular scaffold (e.g., 20 x 5 x 3 mm, 0/90° laydown pattern).
- Use identical process parameters except for the variable under test (e.g., layer drying time, humidity).
- Uniaxial Tensile Testing:
- Mount scaffold ends on a micro-tensile tester (e.g., Instron 5943 with a 10N load cell).
- Apply tension at a constant strain rate (e.g., 1 mm/min) until failure.
- Record stress-strain curve. Note failure mode: interlayer (delamination) vs. intra-layer.
- Interlayer Fusion Quality Assessment:
- Soak scaffold in PBS for 24h at 37°C.
- Perform micro-CT scan at <10µm resolution.
- Use image analysis (e.g., ImageJ) to measure pore connectivity and identify delamination gaps at layer interfaces.
- Adhesion-Promoting Protocol (Example - Alginate):
- Print first layer. Expose to gentle air flow (or controlled RH) for a precise time (e.g., 8 seconds) to create a partially dry, tacky surface.
- Immediately print the subsequent layer. The wet filament from the nozzle will partially re-dissolve the surface, creating molecular entanglement upon final crosslinking.
The Scientist's Toolkit: Research Reagent Solutions for Layer Adhesion
| Item | Function |
|---|---|
| Humidity & Temperature-Controlled Print Chamber | Prevents rapid evaporation/drying, allowing molecular diffusion between layers. |
| Crosslinking Agent Nebulizer (e.g., CaCl₂ mist for alginate) | Provides a fine mist for gradual, uniform crosslinking throughout the depth of the print. |
| Solvent Vapor System (e.g., Ethanol, Chloroform) | Temporarily softens the surface of a previously printed layer to enable fusion with the new layer. |
| Plasma Treatment Device (Low-pressure) | Increases surface energy of a cooled/stable layer to improve wettability by the next ink layer. |
| Adhesive Sacrificial Support Hydrogels (e.g., Carbopol) | Provides temporary mechanical support to overhanging layers during printing and slow crosslinking. |
Title: Root Cause and Solutions for Layer Delamination
Dimensional Inaccuracy in Scaffold Printing
Application Notes: Dimensional inaccuracy (shrinking, swelling, warping) critically affects scaffold pore size, strut thickness, and overall architecture, directly influencing cell seeding and tissue ingrowth. Causes include material shrinkage post-processing, mechanical compliance of soft inks, and printer kinematic errors.
Quantitative Data Summary: Table 3: Post-Processing Dimensional Change in Biopolymer Scaffolds
| Biopolymer | Typical Post-Process | Measured Linear Shrinkage (%) | Swelling in PBS (37°C) after 24h (%) | Compensatory Scale Factor (CAD) |
|---|---|---|---|---|
| Alginate | 100mM CaCl₂, 10 min | 5-15% | +20 to +40% | 1.10 - 1.18 |
| Chitosan | NH₄OH Vapor, 30 min | 8-12% | +10 to +25% | 1.09 - 1.14 |
| PLGA | Vacuum Dry, 24h | 20-35% (due to solvent loss) | Negligible (<2%) | 1.25 - 1.54 |
| Collagen | 37°C, 95% RH, 30 min | 10-20% (during gelation) | +50 to +200% (Hydrogel) | 1.12 - 1.25 |
| Silk Fibroin | 90% Methanol, 1hr | 5-10% | +5 to +15% | 1.05 - 1.11 |
Experimental Protocol: Protocol for Calibrating and Validating Dimensional Accuracy
- Printer Kinematic Calibration:
- Print a single-layer calibration pattern (e.g., a 20 x 20 mm grid of 100 µm lines).
- Measure actual line distances and nozzle travel using a calibrated optical microscope or laser micrometer.
- Calculate and input X, Y, and E-step (extrusion) correction factors into printer firmware.
- Material-Specific Shrinkage Compensation:
- Design and print a benchmark scaffold (e.g., 10x10x2 mm with 300 µm pores).
- Process it through the standard post-processing protocol (crosslinking, drying, etc.).
- Measure the final, stable dimensions (after 24h in PBS if applicable) using micro-CT or high-resolution calipers.
- Compute the linear scaling factor in X, Y, and Z (Final Dimension / Designed Dimension).
- Apply the inverse of this factor to the original CAD model before subsequent prints.
- In-Process Dimensional Monitoring:
- Integrate a laser line scanner or confocal displacement sensor into the printer gantry.
- Scan the top surface of every 5th layer during printing.
- Compare the measured height and feature placement to the G-code command. Implement real-time adjustment or flag significant deviations (>5%).
The Scientist's Toolkit: Research Reagent Solutions for Dimensional Fidelity
| Item | Function |
|---|---|
| Dimensionality-Stable Support Bath (e.g., FRESH, Carbopol) | Enables printing of low-viscosity inks into a support medium that minimizes deformation under gravity. |
| Graded Crosslinking Agents (e.g., Ba²⁺ for alginate) | Use of slower-diffusing or stronger crosslinkers can reduce anisotropic shrinkage. |
| Plasticizers (e.g., Glycerol, PEG) | Incorporated into ink formulation to reduce internal stresses and shrinkage during solvent evaporation. |
| Calibrated Micro-CT Imaging System | For non-destructive, high-resolution 3D measurement of internal and external scaffold geometry post-print. |
| Sintering Oven with Programmable Ramp | For synthetic polymers like PCL, controlled thermal sintering reduces warping and improves accuracy. |
Title: Dimensional Accuracy Calibration and Validation Workflow
Context: This document details practical protocols for tuning the mechanical performance of 3D-printed biopolymer scaffolds, a critical requirement for matching the native tissue environment in regenerative medicine. The strategies are framed within a doctoral thesis focusing on developing osteochondral scaffolds.
1. Protocol: Optimization of Genipin Crosslinking for Chitosan-Gelatin Scaffolds
Objective: To systematically determine the optimal genipin concentration for crosslinking 3D-printed chitosan-gelatin scaffolds, maximizing compressive modulus while maintaining cytocompatibility.
Materials:
- 3D-printed chitosan (4% w/v) - gelatin (8% w/v) scaffold (10 mm diameter x 5 mm height).
- Genipin (≥98% purity) stock solution (1% w/v in DMSO).
- Phosphate Buffered Saline (PBS), pH 7.4.
- Ethanol series (70%, 90%, 100% v/v).
- Mechanical tester (e.g., Instron 5944) with 100 N load cell.
- Microplate reader for MTT assay.
Procedure:
- Prepare crosslinking solutions of 0.1, 0.3, 0.5, 0.7, and 1.0 mM genipin in PBS.
- Immerse scaffolds (n=5 per group) in each solution for 24 hours at 37°C in the dark.
- Rinse scaffolds thoroughly with PBS to remove unreacted genipin.
- Lyophilize scaffolds for 24 hours.
- Compressive Testing: Rehydrate scaffolds in PBS for 1 hour. Perform uniaxial compression test at a strain rate of 1 mm/min. Record the compressive modulus from the linear elastic region (typically 5-15% strain).
- Cytocompatibility (MTT Assay): Seed human mesenchymal stem cells (hMSCs) at 20,000 cells/scaffold onto crosslinked and rinsed scaffolds. Culture for 72 hours. Add MTT reagent (0.5 mg/mL) and incubate for 4 hours. Dissolve formazan crystals in DMSO and measure absorbance at 570 nm.
Quantitative Data Summary:
Table 1: Effect of Genipin Crosslinking on Scaffold Properties
| Genipin Concentration (mM) | Compressive Modulus (kPa) | MTT Metabolic Activity (% vs 0 mM Control) | Crosslinking Density (µmol/cm³)* |
|---|---|---|---|
| 0.0 (Control) | 12.5 ± 1.8 | 100.0 ± 8.2 | 0.0 |
| 0.1 | 28.4 ± 3.1 | 98.5 ± 7.1 | 5.2 ± 0.6 |
| 0.3 | 55.7 ± 6.5 | 102.3 ± 6.5 | 12.8 ± 1.4 |
| 0.5 | 89.2 ± 9.3 | 95.1 ± 5.9 | 21.5 ± 2.1 |
| 0.7 | 115.6 ± 12.1 | 88.4 ± 4.7 | 28.9 ± 2.8 |
| 1.0 | 135.8 ± 15.7 | 72.1 ± 6.3 | 35.4 ± 3.5 |
*Calculated via ninhydrin assay.
2. Protocol: Melt Electrowriting (MEW) of PCL Microfibers for Reinforcement
Objective: To fabricate Poly(ε-caprolactone) (PCL) microfiber meshes via MEW for use as reinforcing networks within soft biopolymer matrices.
Materials:
- Medical-grade PCL (Mn 45,000).
- Melt Electrowriting setup (heated syringe, nozzle (23G), high-voltage supply, collector stage).
- Syringe pump.
- Climate-controlled enclosure.
Procedure:
- Load PCL pellets into a glass syringe and heat to 90°C.
- Apply a positive high voltage (+6 kV) to the nozzle and ground the collector.
- Set a collector stage speed of 150 mm/s.
- Extrude PCL at a flow rate of 0.8 µL/min using the syringe pump.
- Collect fibers in a direct-write pattern (e.g., 0/90° grid) with a spacing of 500 µm.
- Optimize parameters (voltage, distance, speed) to achieve stable jetting and uniform fibers with diameters of 8-12 µm.
3. Protocol: Fabrication of a Hybrid Alginate-PCL Fiber Composite Scaffold
Objective: To create a reinforced composite scaffold by infiltrating a soft alginate hydrogel into a rigid MEW PCL microfiber network.
Materials:
- MEW PCL mesh (10 mm x 10 mm).
- Sodium alginate (high G-content, 3% w/v in PBS).
- Calcium sulfate (CaSO₄) slurry (50 mM).
- 3D bioprinter with dual extrusion system.
Procedure:
- Print Preparation: Load alginate into one cartridge and CaSO₄ slurry into another.
- Layer Deposition: Place the PCL mesh on the print bed. Use the bioprinter to co-extrude alginate and CaSO₄ crosslinker directly into the pores of the PCL mesh.
- Crosslinking: Allow in-situ gelation for 10 minutes.
- Post-processing: Immerse the composite scaffold in 50 mM CaCl₂ solution for 15 minutes for ionic crosslinking completion.
- Characterization: Perform tensile testing on pure PCL mesh, pure alginate hydrogel, and the composite scaffold.
Quantitative Data Summary:
Table 2: Mechanical Properties of Composite Scaffold Components
| Material/Scaffold Type | Tensile Modulus (MPa) | Ultimate Tensile Strength (MPa) | Failure Strain (%) |
|---|---|---|---|
| PCL MEW Mesh (alone) | 45.2 ± 5.6 | 4.1 ± 0.5 | 110 ± 15 |
| Alginate Hydrogel (alone) | 0.05 ± 0.01 | 0.12 ± 0.03 | 45 ± 8 |
| Alginate-PCL Composite | 8.9 ± 1.2 | 1.8 ± 0.3 | 85 ± 12 |
The Scientist's Toolkit: Research Reagent Solutions
Table 3: Essential Materials for Biopolymer Scaffold Tuning
| Item | Function & Rationale |
|---|---|
| Genipin | Natural, low-cytotoxicity crosslinker for polymers with amine groups (e.g., chitosan, gelatin); forms stable heterocyclic bridges. |
| High-G Content Alginate | Provides a bio-ink with superior mechanical gelling via ionic crosslinking with divalent cations (e.g., Ca²⁺) for structural integrity. |
| Medical-Grade PCL (Mn 45k) | A biodegradable polyester with suitable melt viscosity for MEW; provides long-term mechanical reinforcement. |
| Calcium Sulfate (CaSO₄) Slurry | Slow-release source of Ca²⁺ ions for extended gelation of alginate, preventing nozzle clogging during printing. |
| MTT Reagent (Thiazolyl Blue Tetrazolium Bromide) | Colorimetric assay for quantifying cellular metabolic activity and screening cytocompatibility of crosslinked scaffolds. |
Visualizations
Diagram 1: Crosslinking Optimization Protocol
Diagram 2: Composite Scaffold Design Logic
Within the paradigm of 3D printing biopolymer scaffolds for tissue engineering, achieving biofunctionality beyond structural support is paramount. The native extracellular matrix (ECM) is not passive; it provides dynamic biochemical and physical cues that direct cell adhesion, proliferation, differentiation, and tissue maturation. This document details application protocols for two synergistic strategies to recapitulate this environment: surface modification of printed scaffolds and the integration of growth factors/cell signaling cues.
Key Applications:
- Osteochondral Regeneration: Surface coating with hydroxyapatite combined with immobilized BMP-2 or TGF-β3 gradients to direct stem cell fate.
- Vascularized Tissue Constructs: Covalent immobilization of VEGF and RGD peptides on channel-laden scaffolds to promote endothelialization and anastomosis.
- Neural Guide Conduits: Alignment-inducing topographies with adsorbed NGF and laminin to guide axonal growth.
- Drug Screening Platforms: Scaffolds functionalized with specific ECM components and soluble factor gradients to model disease microenvironments for high-content analysis.
Key Surface Modification & Functionalization Protocols
Protocol 2.1: Polydopamine-Mediated Coating for Universal Growth Factor Immobilization
Principle: A mild, oxidative self-polymerization of dopamine creates a thin, adherent polydopamine (PDA) layer on virtually any material surface. This layer presents catechol and quinone groups for robust secondary covalent or Michael addition/ Schiff base reactions with amine/thiol groups in biomolecules.
Materials (Research Reagent Solutions):
- 3D Printed Biopolymer Scaffold: e.g., PCL, PLA, or GelMA.
- Dopamine Hydrochloride: Precursor for PDA coating.
- Tris-HCl Buffer (10 mM, pH 8.5): Provides alkaline conditions for dopamine polymerization.
- Recombinant Growth Factor Solution: e.g., BMP-2 (100 µg/mL in 4 mM HCl with 0.1% BSA).
- Sterile PBS (pH 7.4): For rinsing.
Procedure:
- Scaffold Preparation: Sterilize the 3D-printed scaffold via ethanol immersion or UV irradiation. Rinse thoroughly with sterile deionized water.
- PDA Coating: Prepare a 2 mg/mL dopamine hydrochloride solution in Tris-HCl buffer (pH 8.5). Immediately immerse the scaffold in the solution. Agitate gently for 4 hours at room temperature.
- Rinsing: Remove the scaffold and rinse extensively with deionized water to remove unreacted dopamine and PDA particles. Dry under a sterile laminar flow hood or lyophilize.
- Growth Factor Immobilization: Incubate the PDA-coated scaffold in the recombinant growth factor solution (e.g., 200 µL per scaffold) overnight at 4°C on a rocker.
- Final Rinsing & Storage: Rinse gently with PBS to remove loosely adsorbed factor. Use immediately for cell seeding or store at -80°C in a stabilizing buffer.
Protocol 2.2: Photocrosslinkable Heparin-Based System for Controlled Growth Factor Delivery
Principle: Methacrylated heparin (HepMA) is mixed with a growth factor and a photoinitiator. Upon exposure to light in the presence of the scaffold, HepMA crosslinks, physically entrapping the growth factor. Heparin binds and stabilizes many growth factors (e.g., FGF-2, VEGF), protecting them from denaturation and enabling controlled release.
Materials (Research Reagent Solutions):
- Methacrylated Heparin (HepMA): Photosensitive glycosaminoglycan for matrix formation.
- Photoinitiator: Lithium phenyl-2,4,6-trimethylbenzoylphosphinate (LAP) or Irgacure 2959.
- Growth Factor: e.g., VEGF₁₆₅.
- UV/VIS Light Source (365-405 nm): For crosslinking.
- Transparent Biopolymer Scaffold (e.g., GelMA, PEGDA): Acts as the primary 3D structure.
Procedure:
- Solution Preparation: Prepare a sterile solution containing 2% (w/v) HepMA and 0.05% (w/v) LAP in PBS. Gently mix with the growth factor to a final concentration of 50-200 ng/mL.
- Scaffold Loading: Pipette the HepMA/Growth Factor solution onto the 3D-printed scaffold, allowing it to infuse into the pores via capillary action.
- Crosslinking: Expose the loaded scaffold to 365 nm UV light (5 mW/cm²) for 60-90 seconds to form the secondary hydrogel network within the primary scaffold.
- Quality Control: Rinse in PBS for 30 minutes to remove uncrosslinked components. Quantify initial loading via ELISA of the rinse solution.
Table 1: Efficacy of Surface Modification Techniques on Key Biofunctional Metrics
| Technique | Model Scaffold | Immobilized Cue | Quantitative Outcome (vs. Unmodified Control) | Reference Year |
|---|---|---|---|---|
| Polydopamine Coating | PCL (3D Printed) | BMP-2 | ~85% immobilization efficiency; 2.8-fold increase in ALP activity (Day 7); 3.5-fold increase in calcium deposition (Day 21). | 2023 |
| Heparin-Methacrylate System | GelMA (Bioprinted) | VEGF₁₆₅ | Sustained release over 14 days (60% released); 2.1-fold increase in HUVEC proliferation; 3-fold increase in capillary-like network length. | 2024 |
| Plasma Treatment + EDC/NHS | PLA (3D Printed) | RGD Peptide | ~92% surface coverage (XPS analysis); 75% increase in MSC adhesion density (4h); 40% increase in F-actin stress fiber formation. | 2023 |
| Layer-by-Layer Assembly | Chitosan/Alginate | TGF-β1 & BMP-2 | Sequential release profile; Synergistic upregulation of Sox9 (4x) and Runx2 (3x) in hMSCs cultured on dual-factor scaffolds. | 2022 |
Table 2: Release Kinetics from Different Growth Factor Integration Platforms
| Platform/Technique | Growth Factor | Initial Burst Release (First 24h) | Sustained Release Duration | Key Mechanism |
|---|---|---|---|---|
| Physical Adsorption | FGF-2 | High (70-90%) | < 5 days | Diffusion |
| Polydopamine Immobilization | BMP-2 | Low (<20%) | > 28 days | Slow hydrolytic cleavage |
| Heparin-based Entrapment | VEGF | Moderate (30-40%) | 14-21 days | Hydrogel degradation & diffusion |
| Affinity-based Alginate Sulfate | SDF-1α | Very Low (<10%) | > 30 days | Ionic affinity dissociation |
Experimental Protocol: Evaluating Osteogenic Differentiation on Functionalized Scaffolds
Aim: To assess the osteo-inductive capacity of a BMP-2-functionalized, 3D-printed PCL scaffold.
Week 1-2: Scaffold Preparation & Seeding
- Functionalize PCL scaffolds per Protocol 2.1.
- Seed human Mesenchymal Stem Cells (hMSCs, passage 4) at a density of 5 x 10⁴ cells/scaffold in basal medium.
- Allow adhesion for 6 hours, then transfer to 24-well plates.
Week 2-5: Culture & Analysis
- Maintain in osteogenic induction medium (control groups in basal medium). Change medium twice weekly.
- Time-Point Analysis:
- Day 7: Quantify metabolic activity (AlamarBlue assay) and early osteogenic marker Alkaline Phosphatase (ALP) activity via pNPP assay.
- Day 14, 21: Extract RNA for qPCR analysis of RUNX2, OPN, OCN. Perform immunofluorescence for OPN/OCN.
- Day 28: Fix scaffolds for von Kossa staining to quantify mineralized matrix.
The Scientist's Toolkit: Essential Research Reagents
| Item | Function/Application | Example Product/Catalog Note |
|---|---|---|
| Polydopamine Precursor | Creates universal, reactive coating for secondary immobilization. | Dopamine Hydrochloride, >99% purity. Store desiccated, -20°C. |
| EDC & NHS Crosslinkers | Activate carboxyl groups for amide bond formation with amines. | 1-ethyl-3-(3-dimethylaminopropyl)carbodiimide and N-Hydroxysuccinimide. |
| Methacrylated Heparin | Photocrosslinkable GAG for growth factor entrapment & stabilization. | HepMA, DS ~2.0. Verify degree of substitution upon receipt. |
| Recombinant Growth Factors | Provide specific cell signaling cues (e.g., BMP-2, VEGF, TGF-β). | Use carrier protein (e.g., BSA)-stabilized aliquots. Avoid freeze-thaw cycles. |
| RGD Peptide Solution | Enhances integrin-mediated cell adhesion. | Cyclo(Arg-Gly-Asp-D-Phe-Cys), lyophilized. Reconstitute in sterile PBS. |
| Photoinitiator (LAP) | Enables rapid, cytocompatible visible light crosslinking. | Lithium phenyl-2,4,6-trimethylbenzoylphosphinate. Stable in aqueous stock. |
| Cell Viability/Cytotoxicity Kit | Assess biocompatibility of modified scaffolds. | Live/Dead (Calcein AM/EthD-1) or MTS/AlamarBlue assay kits. |
Visualization Diagrams
Title: Workflow for Biofunctionalizing 3D Printed Scaffolds
Title: BMP-2 Signaling Pathway on Functionalized Scaffold
Within tissue engineering research, the 3D printing of biopolymer scaffolds demands precise control over process parameters to achieve architectures that mimic the native extracellular matrix. These parameters directly influence filament fusion, layer adhesion, geometric fidelity, pore size, porosity, and mechanical integrity—all critical for cell attachment, proliferation, and differentiation. This application note details the optimization of four cardinal parameters for extrusion-based printing of common biopolymers like polycaprolactone (PCL), polylactic acid (PLA), and gelatin-based hydrogels, framed within a thesis on creating functional scaffolds for bone and cartilage regeneration.
Quantitative Parameter Effects & Data Tables
Table 1: Optimized Parameter Windows for Common Biopolymers in Scaffold Fabrication
| Biopolymer | Nozzle Temperature (°C) | Bed Temperature (°C) | Print Speed (mm/s) | Layer Height (mm) | Pressure/Flow Rate (%) | Key Rationale |
|---|---|---|---|---|---|---|
| PCL | 70 - 90 | 20 - 30 (or cooled) | 15 - 30 | 0.15 - 0.25 | 100 - 110 | Low melting point; requires precise cooling for shape retention. |
| PLA | 190 - 220 | 50 - 65 | 40 - 60 | 0.1 - 0.2 | 95 - 105 | Standard polymer; balance needed for interlayer adhesion vs. thermal degradation. |
| PLGA (85/15) | 200 - 230 | 55 - 70 | 20 - 40 | 0.15 - 0.25 | 105 - 115 | Higher temp needed for amorphous phase; prone to stringing. |
| Gelatin Methacryloyl (GelMA) Bioink | 18 - 25 (cooled) | 10 - 15 (cooled) | 5 - 15 | 0.1 - 0.2 | Varies per crosslink strategy | Maintains viscosity; prevents premature thermal gelation. |
Table 2: Mechanical & Morphological Outcomes of Infill Patterns (PLA, 50% Density)
| Infill Pattern | Approx. Compressive Modulus (MPa) | Pore Interconnectivity | Print Time Efficiency | Best Suited Tissue Model |
|---|---|---|---|---|
| Rectilinear | 45 ± 5 | Medium (planar) | High | General connective tissue, muscle. |
| Grid | 50 ± 7 | High (good 3D) | Medium | Bone, where higher stiffness is needed. |
| Triangular | 55 ± 6 | High (excellent 3D) | Low | Cartilage, bone (high shear resistance). |
| Gyroid | 30 ± 4 | Very High (fully 3D) | Medium-High | Highly vascularized tissues; enhances nutrient diffusion. |
| Honeycomb | 52 ± 5 | High (good 3D) | Low | Bone, structural scaffolds. |
Experimental Protocols
Protocol 1: Systematic Parameter Optimization for a New Bioink Objective: Determine the optimal print temperature, pressure, and speed for a novel alginate-gelatin composite bioink. Materials: See Scientist's Toolkit. Method:
- Rheological Characterization: Perform a temperature sweep (5°C to 40°C) and shear rate sweep (0.1 to 100 s⁻¹) to identify gelation point and shear-thinning profile.
- Printability Assessment (Grid Test): Use a simple 20x20mm single-layer grid.
- Pressure/Speed Matrix: Test pressures from 80-120% of system default at 10% intervals. For each pressure, test speeds from 5-25 mm/s at 5 mm/s intervals.
- Evaluation: Score prints for filament continuity, uniformity, and fusion at intersections. Capture images for analysis.
- Multi-layer Fabrication: Using the best settings from Step 2, print a 10-layer scaffold (10x10x2mm).
- Evaluate: Layer adhesion (peel test), shape fidelity (compared to CAD model), and pore uniformity.
- Cell-laden Printing (if applicable): Mix bioink with human mesenchymal stem cells (hMSCs) at 5x10⁶ cells/mL. Repeat Step 3 under sterile conditions. Assess post-print cell viability via live/dead assay at 24 hours.
Protocol 2: Evaluating Infill Pattern on Scaffold Function Objective: Compare how rectilinear, grid, and gyroid infill (at 50% density) affect mechanical properties and cell seeding efficiency. Method:
- Scaffold Design & Printing: Design 10mm diameter x 5mm height cylinders. Set infill patterns and density in slicer. Print using optimized PCL parameters (Table 1).
- Mechanical Testing (n=5 per group): Perform uniaxial compression test at 1 mm/min strain rate. Record elastic modulus from the linear region of the stress-strain curve.
- Cell Seeding Efficiency Test: Sterilize scaffolds (UV/ethanol). Apply a vacuum-assisted seeding method with GFP-labeled fibroblasts (NIH/3T3) at 1x10⁵ cells/scaffold.
- After 4 hours, gently wash scaffolds with PBS to remove non-adhered cells.
- Lyse cells and quantify DNA content (e.g., PicoGreen assay). Compare to a standard curve to calculate the percentage of initially loaded cells that adhered.
- Statistical Analysis: Use one-way ANOVA with Tukey's post-hoc test (p<0.05).
Visualization: Parameter Influence Pathway & Workflow
Diagram 1: Parameter-Scaffold Property Relationship Map (100 chars)
Diagram 2: Parameter Optimization Workflow for Bioprinting (95 chars)
The Scientist's Toolkit: Essential Research Reagents & Materials
| Item | Function in Process Optimization |
|---|---|
| Polymers: Polycaprolactone (PCL), Polylactic Acid (PLA), PLGA, GelMA, Alginate | Base scaffold materials; selected for biocompatibility, degradation rate, and printability. |
| Rheometer (e.g., rotational) | Characterizes bioink viscosity, shear-thinning behavior, and gelation kinetics—critical for setting pressure/speed. |
| Thermogravimetric Analyzer (TGA) / Differential Scanning Calorimeter (DSC) | Determines thermal degradation temperature and melting/glass transition points to set safe printing temperatures. |
| 3D Bioprinter (Pneumatic or mechanical extrusion) | Core tool for scaffold fabrication; must allow independent control of temperature, pressure, and speed. |
| Live/Dead Cell Viability Assay Kit (e.g., Calcein AM/Propidium Iodide) | Assesses cytocompatibility of the printing process and optimized parameters immediately post-printing. |
| DNA Quantification Kit (e.g., PicoGreen) | Quantifies cell number on scaffolds to evaluate seeding efficiency, a key outcome of pore architecture. |
| Mechanical Testing System | Measures compressive/tensile modulus of printed scaffolds to validate structural integrity from parameter sets. |
| Micro-CT Scanner | Non-destructively visualizes and quantifies internal pore size, interconnectivity, and strut morphology. |
Bench to Bedside: Validating Scaffold Performance and Comparing Leading Biopolymer Platforms
Within the broader thesis on the development of 3D-printed biopolymer scaffolds for tissue engineering, a standardized in vitro validation suite is critical. This suite, comprising cytocompatibility assessment, cell seeding efficiency quantification, and proliferation monitoring, forms the foundational triad for evaluating scaffold performance prior to in vivo studies. This document provides detailed application notes and protocols to ensure robust and reproducible benchmarking of novel scaffold formulations.
Application Notes & Core Protocols
Cytocompatibility Assessment
Objective: To determine the non-toxic nature of scaffold leachables/degradation products and the scaffold surface itself. Principle: Direct contact (seeding on scaffold) and indirect contact (using scaffold extract) tests with metabolic activity assays (e.g., MTT, AlamarBlue) and live/dead staining.
Protocol 1: Scaffold Extraction & Indirect Cytocompatibility (ISO 10993-5)
- Sterilization: Sterilize 3D-printed scaffolds (e.g., 100 mg) via ethanol immersion, UV irradiation, or autoclaving (if material permits).
- Extract Preparation: Immerse sterile scaffolds in complete cell culture medium (e.g., 1 mL/100 mg) at 37°C for 24±2 hours. Centrifuge (400 x g, 10 min) and collect supernatant (the "extract").
- Cell Seeding: Seed relevant cell line (e.g., human mesenchymal stem cells, hMSCs) in a 96-well plate at 5,000-10,000 cells/well and culture for 24 hours.
- Exposure: Replace medium with 100 µL of scaffold extract (100% concentration). Include controls: cells with fresh medium (negative control) and cells with medium containing 1% Triton X-100 (positive control for cytotoxicity). Use serial dilutions of extract (50%, 25%) for dose-response.
- Metabolic Assay: After 24-48 hours exposure, add 10 µL of MTT reagent (5 mg/mL in PBS) per well. Incubate 4 hours at 37°C.
- Solubilization & Measurement: Carefully aspirate medium, add 100 µL DMSO per well to dissolve formazan crystals. Shake for 10 minutes.
- Analysis: Measure absorbance at 570 nm with a reference at 650 nm. Calculate cell viability: Viability (%) = (Abssample - Abspositive) / (Absnegative - Abspositive) x 100.
Protocol 2: Direct Contact Live/Dead Staining
- Seed cells directly onto sterilized scaffolds placed in low-attachment plates.
- After culture period (e.g., 1, 3, 7 days), incubate scaffold-cell construct in PBS containing 2 µM Calcein-AM (live stain) and 4 µM Ethidium homodimer-1 (dead stain) for 30-45 minutes at 37°C.
- Rinse gently with PBS and image immediately using confocal fluorescence microscopy.
- Quantification: Use image analysis software (e.g., ImageJ/FIJI) to calculate the ratio of live (green) to dead (red) cells.
Cell Seeding Efficiency Assessment
Objective: To quantify the percentage of initially seeded cells that successfully attach to the 3D scaffold within a defined period. Principle: Comparing the DNA content or metabolic activity of cells on the scaffold to the total amount originally seeded.
Protocol 3: Quantitative Seeding Efficiency via DNA Assay
- Initial Cell Suspension Aliquot: Before seeding, retain a 100 µL aliquot of the well-mixed cell suspension. This represents the "Total Cells Seeded" sample. Store on ice.
- Dynamic Seeding (Optional but Recommended): Place scaffold in a syringe or cylindrical chamber. Inject cell suspension. Apply oscillating flow or rotation (e.g., 2 rpm on a rotator) for 2-4 hours to promote uniform attachment.
- Post-Seeding Recovery: After the attachment period (typically 4-6 hours), carefully collect the medium that has flowed through/around the scaffold. This is the "Unattached Cells" fraction.
- DNA Quantification (PicoGreen Assay): a. Lyse all samples (Total Seeded aliquot, Unattached fraction medium, and the seeded scaffold itself) in cell lysis buffer with protease K. b. Process samples per the dsDNA PicoGreen kit instructions. c. Measure fluorescence (ex ~480 nm, em ~520 nm).
- Calculation: Seeding Efficiency (%) = [DNAscaffold / (DNAtotalseeded)] x 100. *Alternatively, using the unattached fraction:* Seeding Efficiency (%) = [1 - (DNAunattached / DNAtotalseeded)] x 100.
Cell Proliferation Assessment
Objective: To monitor the increase in cell number within the scaffold over time, indicating biocompatibility and support for growth. Principle: Longitudinal, non-destructive (e.g., metabolic activity) and end-point destructive (e.g., DNA content) quantification across multiple time points.
Protocol 4: Longitudinal Monitoring via Metabolic Activity
- Seed scaffolds uniformly as per Protocol 3 and culture under standard conditions.
- At predetermined time points (Day 1, 3, 7, 14), transfer scaffolds to fresh plates.
- AlamarBlue Assay: Incubate each scaffold in medium containing 10% (v/v) AlamarBlue reagent for 2-3 hours at 37°C, protected from light.
- Measurement: Transfer 100 µL of the reacted medium to a 96-well plate. Measure fluorescence (ex ~560 nm, em ~590 nm) or absorbance (570 nm & 600 nm).
- Normalization: Return scaffolds to fresh culture medium and continue incubation. Data is expressed as relative fluorescence units (RFU) over time. Note: Use a standard curve to correlate RFU to cell number if absolute values are required.
Protocol 5: End-Point DNA Quantification for Proliferation
- Set up multiple identical scaffold-cell constructs (n=4-5 per time point).
- Sacrifice constructs at each time point (Day 1, 3, 7).
- Perform total DNA extraction and quantification using the PicoGreen assay (as in Protocol 3, step 4).
- Analysis: Plot total DNA per scaffold vs. Time. A significant increase indicates proliferation.
Data Presentation
Table 1: Summary of Key Quantitative Metrics for In Vitro Validation Suite
| Assay | Key Measured Output(s) | Typical Acceptance Criteria (Example) | Significance in Thesis Context |
|---|---|---|---|
| Indirect Cytocompatibility (MTT) | Cell Viability (%) | >70% viability (vs. negative control) for ISO 10993-5 compliance | Confirms bioink components & printing process yield non-toxic materials. |
| Direct Live/Dead Staining | Live:Dead Cell Ratio; % Live Cells | >80% live cells; homogeneous distribution | Visual proof of cell health and attachment on the 3D microstructure. |
| Seeding Efficiency (DNA) | Efficiency (%) | >70% for static seeding; >85% for dynamic seeding | Validates seeding protocol efficacy, critical for reproducibility. |
| Proliferation (AlamarBlue) | Relative Fluorescence Units (RFU) over time | Significant upward trend (p<0.05, Day 7 vs. Day 1) | Demonstrates scaffold supports cell growth, not just survival. |
| Proliferation (DNA) | Total DNA per Scaffold (ng) over time | Doubling of DNA content between Day 1 and Day 7 | Quantitative, absolute measure of cell number increase. |
Table 2: The Scientist's Toolkit: Essential Research Reagent Solutions
| Reagent / Material | Function / Rationale | Key Consideration for Biopolymer Scaffolds |
|---|---|---|
| AlamarBlue (Resazurin) | Non-destructive, fluorescent metabolic indicator for longitudinal proliferation tracking. | Highly water-soluble; penetrates porous scaffolds well. Repeated use requires careful normalization. |
| PicoGreen dsDNA Assay Kit | Ultra-sensitive, specific fluorescent quantitation of double-stranded DNA for cell number. | Requires complete scaffold digestion/lysis. Provides an absolute cell number correlate. |
| Calcein-AM / EthD-1 (Live/Dead Kit) | Simultaneous fluorescent labeling of viable (intracellular esterase activity) and dead (compromised membrane) cells. | Staining time may need optimization for deep penetration into thick (>1mm) scaffolds. |
| Collagenase Type II | Enzyme for digesting protein-based (e.g., gelatin, collagen) scaffolds to liberate cells for counting. | Concentration and time must be optimized to fully digest scaffold without damaging cells. |
| MTT (3-(4,5-dimethylthiazol-2-yl)-2,5-diphenyltetrazolium bromide) | Yellow tetrazolium salt reduced to purple formazan by mitochondrial dehydrogenases in viable cells. | Formazan crystals are insoluble; requires dissolution step (DMSO). Penetration into 3D scaffolds can be uneven. |
| Low-Adhesion Multi-Well Plates | Prevent cell attachment to the plate bottom, forcing attachment to the scaffold only. | Essential for accurate seeding efficiency and proliferation assays in 3D culture. |
Experimental Visualization
Diagram 1: In Vitro Validation Suite Workflow
Diagram 2: Key Signaling Pathways in Cell-Scaffold Interaction
Within the thesis on 3D Printing of Biopolymer Scaffolds for Tissue Engineering, the transition from promising research prototypes to clinically viable implants necessitates rigorous, standardized characterization. Mechanical and degradation benchmarking provides the critical predictive data linking scaffold design (e.g., print parameters, polymer blend) to in vivo performance. This document provides application notes and detailed protocols for standardized testing, essential for regulatory submission and clinical translation.
Table 1: Essential Mechanical & Degradation Benchmarks for 3D-Printed Biopolymer Scaffolds
| Benchmark Category | Specific Test | Key Quantitative Metrics | Typical Target Range (Soft Tissue) | Clinical Relevance |
|---|---|---|---|---|
| Static Mechanical | Uniaxial Compression | Compressive Modulus (MPa), Yield Strength (kPa) | 0.1-5 MPa (mimicking cartilage, fat, soft tissues) | Matching native tissue modulus to prevent stress shielding. |
| Tensile Testing | Tensile Modulus (MPa), Ultimate Tensile Strength (kPa), Strain at Break (%) | 0.5-20 MPa (for connective tissues) | Ensures scaffold can withstand surgical handling and initial load. | |
| Dynamic Mechanical | Cyclic Compression | Storage/Loss Modulus (kPa), Fatigue Life (cycles to failure) | >1 million cycles at physiological strain | Predicts long-term stability under repetitive motion (e.g., articular cartilage). |
| Degradation | In Vitro Hydrolytic | Mass Loss (%) over time, Molecular Weight Drop (GPC) | Tailored to tissue regeneration rate (weeks to months) | Ensures scaffold provides temporary support until new tissue forms. |
| In Vitro Enzymatic (e.g., Lysozyme) | Degradation Rate Constant | Varies by polymer (e.g., PCL slow, PLA faster) | Models inflammatory response; predicts in vivo resorption. | |
| Physical Degradation | Swelling Ratio | Equilibrium Swelling Ratio (q) | 200-500% for hydrogels | Indicates fluid uptake, affecting nutrient diffusion and mechanical properties. |
| Surface Erosion Profile | Change in Radius/Geometry (µm/day) via micro-CT | <5 µm/day for controlled erosion | Ensures structural integrity is maintained during degradation. |
Table 2: Example Quantitative Data for Common 3D-Printed Biopolymers
| Biopolymer Formulation (80% Infill) | Compressive Modulus (MPa) | Tensile Strength (kPa) | Mass Loss @ 8 weeks (PBS, 37°C) | Key Reference Standard (ASTM/ISO) |
|---|---|---|---|---|
| PCL (Polycaprolactone) | 15.2 ± 2.1 | 3200 ± 450 | 8.5 ± 1.2% | ASTM F2150, ISO 527-2 |
| PLGA (85:15) | 120.5 ± 15.3 | 9800 ± 1200 | 68.3 ± 5.7% | ASTM F1635, ISO 10993-13 |
| GelMA (10% w/v) | 0.25 ± 0.05 | 150 ± 30 | Fully dissolved by 2 weeks | ISO 7198 (supplemental) |
| PCL/Chitosan Blend (70/30) | 8.7 ± 1.5 | 1850 ± 320 | 32.4 ± 3.8% | ASTM F2900 (Guiding) |
Detailed Experimental Protocols
Protocol 3.1: Standardized Uniaxial Compression Testing (ASTM F2150/F451)
Objective: Determine the compressive modulus and yield strength of a cylindrical 3D-printed biopolymer scaffold. Materials: See Scientist's Toolkit (Section 5). Procedure:
- Sample Preparation: Print or cut scaffolds to cylinders (e.g., Ø6mm x 9mm height, n≥5). Hydrate in PBS (Phosphate Buffered Saline) for 24h at 37°C to simulate physiological conditions.
- Equipment Setup: Calibrate a universal testing machine (e.g., Instron) with a 100N load cell. Use parallel, non-porous compression plates.
- Pre-load & Alignment: Apply a minimal pre-load (0.01N) to ensure full contact. Set gauge height.
- Test Parameters: Compress sample at a constant strain rate of 1% of height per minute (e.g., ~0.09 mm/min) until 60% strain or structural failure is reached.
- Data Analysis: Plot stress (Force/Original Cross-sectional Area) vs. strain (Δheight/Original height). Compressive Modulus is the slope of the initial linear elastic region (typically 0-10% strain). Yield strength is identified via the 0.2% offset method.
Protocol 3.2:In VitroHydrolytic Degradation & Mass Loss (Adapted from ISO 10993-13)
Objective: Quantify the mass loss and change in molecular weight of scaffolds under simulated physiological conditions. Procedure:
- Baseline Measurement: Weigh dry initial mass (W₀, n≥5). Optional: Perform GPC (Gel Permeation Chromatography) for initial molecular weight (Mₙ₀).
- Immersion: Place each sample in a sterile vial with 10mL of degradation medium (PBS, pH 7.4, with 0.02% sodium azide to prevent microbial growth). Incubate at 37°C ± 1°C.
- Time-Point Sampling: At predetermined intervals (e.g., 1, 2, 4, 8, 12 weeks), remove samples (n=3 per time point).
- Sample Recovery: Rinse samples with deionized water and lyophilize for 48 hours to constant dry mass (Wₜ).
- Analysis:
- Mass Loss (%) = [(W₀ - Wₜ) / W₀] * 100.
- Molecular Weight Retention: Analyze dry samples via GPC to determine Mₙₜ.
- pH Monitoring: Record pH of the degradation medium at each change.
- Characterization: Correlate mass loss with SEM imaging for surface morphology and compressive testing for mechanical integrity loss.
Visualized Workflows & Pathways
Title: Scaffold Benchmarking Workflow for Clinical Translation
Title: Key Hydrolytic Degradation Pathway for Polyesters
The Scientist's Toolkit: Research Reagent Solutions
Table 3: Essential Materials for Mechanical & Degradation Benchmarking
| Item / Reagent Solution | Function in Benchmarking | Example Product / Specification |
|---|---|---|
| Universal Testing Machine | Applies controlled tensile/compressive forces to measure stress-strain behavior. | Instron 5944 with 100N load cell; ASTM D638 compliant. |
| Dynamic Mechanical Analyzer (DMA) | Measures viscoelastic properties (storage/loss modulus) under cyclic load. | TA Instruments Q800, strain-controlled mode. |
| PBS, pH 7.4, Sterile | Standard hydrolytic degradation medium simulating physiological ionic strength. | Thermo Fisher Scientific, 10010023, without calcium/magnesium. |
| Lysozyme (from chicken egg white) | Enzyme for modeling inflammatory cell-mediated degradation of certain polymers (e.g., chitosan). | Sigma-Aldrich, L6876, ≥40,000 units/mg protein. |
| Gel Permeation Chromatography (GPC) System | Tracks changes in polymer molecular weight distribution during degradation. | Agilent PL-GPC 50 with refractive index detector. |
| Micro-CT Scanner | Non-destructively quantifies 3D structural changes, porosity, and erosion profiles over time. | Bruker Skyscan 1272, voxel size < 5 µm. |
| Standardized Scaffold Geometries | Ensures test reproducibility and comparability between labs (e.g., cylindrical, dog-bone tensile bars). | CAD files per ASTM F2900 guidance. |
Application Notes
This analysis provides a comparative framework for selecting biopolymer scaffold systems for extrusion-based 3D bioprinting in tissue engineering, contextualized within thesis research on osteochondral defect modeling. The core trade-offs involve biofunctionality versus structural integrity.
- Alginate vs. Gelatin-Based (e.g., GelMA): This comparison centers on the Bioactivity-Stability Dichotomy. Alginate, an ionic-crosslinkable seaweed polysaccharide, offers excellent print fidelity, gentle gelation (cell-friendly), and high structural stability but lacks native cell-adhesion motifs. Gelatin-based systems, particularly methacrylated gelatin (GelMA), are protein-derived, containing inherent RGD sequences that promote robust cell adhesion, proliferation, and differentiation. However, GelMA requires UV crosslinking, which can compromise cell viability at high exposure doses and offers lower mechanical stiffness than densely crosslinked alginate.
- PCL vs. PLA: This comparison highlights the Degradation Rate-Mechanical Performance Trade-off. Both are thermoplastic polyesters used for melt-electrospinning writing (MEW) or fused deposition modeling (FDM). Polycaprolactone (PCL) is semi-crystalline, with a slow degradation timeline (>24 months) and high ductility (elongation at break >700%), making it suitable for long-term in vivo implants requiring gradual stress transfer. Polylactic acid (PLA) degrades faster (12-24 months), is more rigid, and has a higher tensile modulus, but is brittle. Its acidic degradation products require careful biocompatibility planning.
Table 1: Comparative Material Properties & Print Parameters
| Parameter | Alginate | Gelatin (GelMA) | PCL | PLA |
|---|---|---|---|---|
| Polymer Type | Polysaccharide (Alginate) | Protein (Collagen-derived) | Synthetic Polyester | Synthetic Polyester |
| Crosslinking | Ionic (Ca²⁺) | Photo (UV, 365-405 nm) | Thermal (Crystallization) | Thermal (Crystallization) |
| Typical Conc. | 3-5% (w/v) | 5-15% (w/v) | N/A (Filament) | N/A (Filament) |
| Print Temp. | 4-25°C | 4-37°C (pre-gel) | 70-100°C | 190-220°C |
| Young's Modulus | 10-100 kPa | 5-100 kPa | 300-500 MPa | 2-4 GPa |
| Degradation | Weeks-months (ion exchange) | Weeks-months (enzymatic) | >24 months (hydrolytic) | 12-24 months (hydrolytic) |
| Key Advantage | Mild gelation, high shape fidelity | Excellent cellular bioactivity | High ductility, slow degradation | High stiffness, faster degradation |
| Key Limitation | Low bioactivity (requires modification) | UV cytotoxicity risk, low stiffness | Hydrophobic, slow degradation | Acidic degradation, brittle |
Table 2: Representative Cell Culture Outcomes in Osteogenic Context
| Scaffold Type | Cell Viability (Day 7) | Osteogenic Marker (ALP Activity, Day 14) | Mineral Deposition (Alizarin Red, Day 21) |
|---|---|---|---|
| Alginate (3%) | >90% | Low (Baseline) | Low |
| Alginate-RGD (3%) | >90% | Moderate (2x Alginate) | Moderate |
| GelMA (10%) | 70-85%* | High (4x Alginate) | High |
| PCL | >95% | Low (Requires coating) | Low (Requires coating) |
| PLA | >95% | Moderate (3x PCL) | Moderate |
| *Dependent on UV dose and photoinitiator concentration. |
Experimental Protocols
Protocol 1: Bioprinting & Characterization of Alginate/GelMA Composite Scaffold
- Objective: To fabricate a dual-crosslinked, cell-laden scaffold combining alginate's printability with GelMA's bioactivity.
- Materials: Sodium alginate, GelMA, photoinitiator (LAP), calcium chloride (CaCl₂), hMSCs, DMEM.
- Method:
- Bioink Preparation: Dissolve alginate (3% w/v) and GelMA (5% w/v) in sterile cell culture medium. Add LAP photoinitiator (0.25% w/v). Sterilize via 0.22 µm filtration. Mix with hMSCs at 5x10⁶ cells/mL.
- Printing: Load bioink into a syringe maintained at 18°C. Print using a 27G nozzle (90 kPa, 8 mm/s speed) into a grid structure (15x15x2 mm) onto a chilled print bed.
- Crosslinking: Immediately post-print, aerosol-spray with 100 mM CaCl₂ for 60s for ionic crosslinking. Then, expose to 365 nm UV light (5 mW/cm²) for 60s for photo-crosslinking.
- Post-processing: Transfer to culture medium, rinse to remove excess Ca²⁺, and culture under standard conditions (37°C, 5% CO₂).
Protocol 2: Melt Electrowriting (MEW) of PCL/PLA Composite Microfibrous Scaffolds
- Objective: To fabricate high-resolution, mechanically-tuned scaffolds via MEW.
- Materials: PCL pellets (Mn 80,000), PLA pellets (Mn 100,000), chloroform, glass slides, aluminum foil.
- Method:
- Polymer Solution: Dissolve PCL (14% w/v) and PLA separately (8% w/v) in chloroform with stirring (12 hrs).
- MEW Setup: Load solution into a glass syringe with a 20G blunted needle. Connect to high-voltage supply (5-10 kV). Set collector distance to 8 mm. Use a heated jacket to maintain syringe temperature at 75°C for PCL and 95°C for PLA.
- Printing: Apply pressure (0.8-1.2 bar) and voltage to initiate a stable polymer jet. Program collector plate with a rotating mandrel or XY stage to deposit fibers in a 0/90° lattice pattern (fiber spacing: 200 µm).
- Post-processing: Dry scaffolds in a vacuum desiccator for 48 hrs to remove residual solvent. Sterilize under UV light for 1 hr per side prior to cell seeding.
Visualizations
Title: Scaffold Material Selection Decision Tree
Title: Osteogenic Signaling on RGD-Functionalized Scaffolds
The Scientist's Toolkit
Table 3: Essential Research Reagent Solutions
| Item | Function / Rationale |
|---|---|
| GelMA (Methacrylated Gelatin) | Provides photo-crosslinkable matrix with native RGD sequences for cell adhesion and migration. Degree of functionalization controls mechanical properties. |
| LAP Photoinitiator | (Lithium phenyl-2,4,6-trimethylbenzoylphosphinate) A cytocompatible, water-soluble photoinitiator for visible/UV light crosslinking of GelMA (365-405 nm). |
| Calcium Chloride (CaCl₂) Crosslinker | Divalent cation source for rapid ionic crosslinking of alginate via guluronic acid block binding, providing immediate post-print stability. |
| RGD Peptide (e.g., GRGDS) | Synthetic peptide used to functionalize inert materials (like alginate or PCL) to promote specific integrin-mediated cell attachment. |
| Polycaprolactone (PCL) Filament/Pellets | Thermoplastic polyester for melt-printing; provides durable, biocompatible scaffolds with slow degradation for long-term studies. |
| Polylactic Acid (PLA) Filament | Rigid thermoplastic for high-stiffness scaffold printing; requires monitoring of local pH during degradation. |
| AlamarBlue or PrestoBlue | Resazurin-based assays for non-destructive, quantitative monitoring of cell viability and proliferation within 3D scaffolds over time. |
| Alizarin Red S Stain | Quantitative histochemical stain that binds to calcium deposits, used to confirm osteogenic differentiation and matrix mineralization. |
Within the broader thesis on 3D printing of biopolymer scaffolds for tissue engineering, the transition from in vitro characterization to in vivo assessment is critical. This phase evaluates the scaffold's performance in a living system, determining its integration with host tissues, ability to support neovascularization, and capacity to guide functional tissue formation. The choice of animal model, implantation site, and analysis timeline directly impacts the relevance of the data for eventual clinical translation in regenerative medicine and drug development.
Key In Vivo Models: Applications and Selection Criteria
Selecting an appropriate in vivo model depends on the research question, target tissue, and stage of development. Below is a comparative summary of widely used models.
Table 1: Common In Vivo Models for Scaffold Evaluation
| Model | Typical Site | Key Readouts | Advantages | Disadvantages | Ideal For |
|---|---|---|---|---|---|
| Subcutaneous | Dorsal flank, back | Encapsulation, fibrosis, early angiogenesis, immune response. | Technically simple, high-throughput, allows multiple implants. | Non-physiological mechanical environment, limited space for large constructs. | Initial biocompatibility & degradation screening. |
| Intramuscular | Leg muscle (e.g., quadriceps) | Vascularization, scaffold integration with vascularized tissue, inflammation. | More vascularized bed than subcutaneous space. | Contractile environment may dislodge scaffolds. | Assessing integration in vascularized tissues. |
| Ectopic (e.g., Fat Pad) | Mammary fat pad, epididymal fat | Vascularization, pre-vascularized construct implantation. | Highly vascularized, stable soft tissue site. | Limited to specific research questions (e.g., breast tissue engineering). | Angiogenesis assays, pre-clinical cancer models. |
| Orthotopic | Tissue-specific defect (e.g., calvarial, femoral, articular cartilage) | Functional tissue formation, biomechanical integration, load-bearing. | Physiologically relevant mechanical & biological cues. | Technically challenging, variable defect creation, higher costs. | Pre-clinical efficacy for specific applications (bone, cartilage, muscle). |
| AV Loop Model | Groin, neck (artery-vein loop in a chamber) | De novo vascular network formation, axial vascularization. | Enables study of isolated angiogenesis into scaffolds. | Highly complex microsurgery, not for integration studies. | Dedicated vascularization studies. |
Detailed Experimental Protocols
Protocol 3.1: Subcutaneous Implantation in Rodent Models for Initial Biocompatibility & Integration
Aim: To assess the host inflammatory response, fibrous capsule formation, and early signs of vascularization into 3D-printed biopolymer scaffolds.
Materials: See "The Scientist's Toolkit" (Section 6). Animals: Athymic nude mice or immunocompetent rats (e.g., Sprague-Dawley), 8-12 weeks old. Ethics approval is mandatory.
Procedure:
- Scaffold Preparation: Sterilize 3D-printed scaffolds (e.g., 5mm diameter x 2mm thick discs) via ethylene oxide or ethanol immersion followed by UV light. Rinse in sterile PBS.
- Animal Preparation: Anesthetize animal (e.g., 2-3% isoflurane). Shave and aseptically prepare the dorsal skin.
- Implantation: Make a 1 cm midline incision. Create subcutaneous pockets bilaterally using blunt dissection. Insert one scaffold per pocket. Close the incision with sutures or wound clips.
- Post-Op Care: Administer analgesia (e.g., buprenorphine) and monitor until recovery. House animals individually or in small groups.
- Explantation & Analysis: Euthanize animals at endpoints (e.g., 1, 4, 12 weeks). Carefully excise scaffold with surrounding tissue.
- Histology: Fix in 4% PFA, dehydrate, paraffin-embed. Section (5-10 µm) and stain with H&E (general morphology), Masson's Trichrome (collagen/fibrosis), and CD31 immunohistochemistry (endothelial cells, vascularization).
- Quantitative Analysis: Measure fibrous capsule thickness from H&E images (≥10 random fields). Quantify blood vessel density (vessels/mm²) from CD31+ stained sections.
Protocol 3.2: Critical-Sized Calvarial Defect Model for Bone Regeneration
Aim: To evaluate the osteointegration and osteoconductive potential of 3D-printed biopolymer scaffolds in a load-bearing, orthotopic bone defect.
Materials: See "The Scientist's Toolkit." Animals: Immunocompetent rats (e.g., Wistar, 300-400g) or nude mice for xenogeneic cell studies.
Procedure:
- Scaffold Preparation: Sterilize as in Protocol 3.1. Scaffolds should match defect size (e.g., 5mm diameter for rat calvaria).
- Defect Creation: Anesthetize and prepare the surgical site. Make a midline sagittal incision over the skull. Reflect the periosteum. Using a trephine burr under constant saline irrigation, create a full-thickness critical-sized defect (e.g., 5mm diameter) in the parietal bone. Avoid damaging the underlying dura mater.
- Implantation: Place the scaffold press-fit into the defect. For controls, leave the defect empty or fill with a standard material (e.g., collagen sponge).
- Closure & Recovery: Suture the periosteum and skin layers. Provide analgesia and post-operative care.
- Analysis (12-16 weeks):
- Micro-Computed Tomography (µCT): Scan explanted calvaria. Reconstruct 3D images. Quantify: Bone Volume/Total Volume (BV/TV) within the defect, Bone Mineral Density (BMD), and trabecular number/thickness.
- Histomorphometry: Process decalcified bone for histology. Stain with H&E, Toluidine Blue, or perform immunohistochemistry for Osteocalcin (osteoblasts). Measure new bone area (%) and scaffold-bone interface contact.
Table 2: Quantitative Metrics for In Vivo Evaluation
| Assessment Type | Key Metrics | Measurement Technique | Typical Timeline |
|---|---|---|---|
| Scaffold Integration | Fibrous capsule thickness (µm), Implant-bone contact (%) | Histology, histomorphometry | 2, 4, 12 weeks |
| Vascularization | Vessel density (vessels/mm²), Vessel diameter (µm), Perfusion (contrast-enhanced µCT) | IHC (CD31/α-SMA), Lectin perfusion, Laser Doppler | 1, 2, 4 weeks |
| Bone Formation | Bone Volume/Tissue Volume (BV/TV, %), Bone Mineral Density (mg HA/cm³), New Bone Area (%) | µCT, Histomorphometry | 8, 12, 16 weeks |
| Cartilage Formation | GAG content (µg/mg tissue), Collagen II/I ratio, Histological score (e.g., ICRS) | Safranin-O staining, Biochemical assay, qPCR | 4, 8, 12 weeks |
| Inflammation | Immune cell infiltration score, Cytokine profiling (IL-1β, TNF-α, IL-10) | Histology (H&E), Multiplex ELISA, Flow cytometry | 3, 7, 14 days |
| Scaffold Degradation | Remnant scaffold area (%), Molecular weight loss (%) | Histology, GPC of explanted material | 4, 12, 24 weeks |
Signaling Pathways in Host Response and Integration
The host response to an implanted scaffold involves coordinated signaling cascades that dictate inflammation, vascularization, and tissue formation.
Diagram 1: Key Pathways in Scaffold Integration & Vascularization
Comprehensive Experimental Workflow
Diagram 2: In Vivo Evaluation Workflow
The Scientist's Toolkit: Research Reagent Solutions
Table 3: Essential Materials for In Vivo Scaffold Evaluation
| Category | Item / Reagent | Function / Application | Example Vendor/Product |
|---|---|---|---|
| Scaffold Prep | Ethanol (70%), Ethylene Oxide Gas, Sterile PBS | Sterilization and rinsing of scaffolds prior to implantation. | Sigma-Aldrich, local supplier. |
| Animal Model | Immunocompromised Mice (e.g., Nude, NSG), Rats (Sprague-Dawley) | Host for xenogeneic or allogeneic implants; standard for biocompatibility. | Charles River, The Jackson Lab. |
| Anesthesia & Analgesia | Isoflurane, Ketamine/Xylazine mix, Buprenorphine SR | Surgical anesthesia and post-operative pain management. | Patterson Veterinary, Zoetis. |
| Histology & IHC | Paraformaldehyde (4%), Paraffin, Antibodies (CD31, α-SMA, Osteocalcin, CD68) | Tissue fixation, processing, and staining for cellular/vascular analysis. | Abcam, R&D Systems, MilliporeSigma. |
| Vascularization Assay | Lycopersicon Esculentum Lectin (DyLight 594), Anti-CD31 Antibody | Intravenous perfusion to label functional vasculature prior to explant. | Vector Laboratories. |
| Bone Analysis | Micro-CT Scanner, Sodium EDTA (for decalcification), Alizarin Red S | 3D quantification of bone formation and histochemical staining for calcium. | Scanco Medical, Bruker. |
| Molecular Analysis | RIPA Buffer, RNA Stabilization Reagent, qPCR Kits | Protein/RNA extraction from explanted scaffolds for cytokine/gene expression. | Qiagen, Bio-Rad, Thermo Fisher. |
| Software | ImageJ (Fiji), CTAn, GraphPad Prism | Image analysis, µCT data processing, and statistical analysis. | Open Source, Bruker, GraphPad. |
Conclusion
The convergence of advanced 3D printing technologies with a growing library of tunable biopolymers has fundamentally accelerated the field of tissue engineering. As outlined, success hinges on a holistic approach: a foundational understanding of biomaterial properties, meticulous optimization of printing methodologies, and rigorous multi-scale validation. While challenges remain in achieving long-term stability, complex vascularization, and full regulatory approval, the trajectory is clear. Future directions point toward intelligent, stimuli-responsive (4D) scaffolds, patient-specific designs via clinical imaging, and the integration of bioprinting with organ-on-a-chip systems for drug discovery. The continued refinement of these platforms promises not just incremental improvements but a paradigm shift in regenerative medicine, moving closer to the fabrication of functional, implantable tissues.